STOKKI GUIDEHow to use Stokki
Find, organize and make it your own. Choose a task and follow the steps alongside the screen.
01
Home screen
01Switch between items and locations
Find something by the item itself or by where you keep it.
- Tap “Items” or “Locations” at the top of the home screen.
- In the locations view, tap a location card to see the items stored there.
Back to contents ↑ 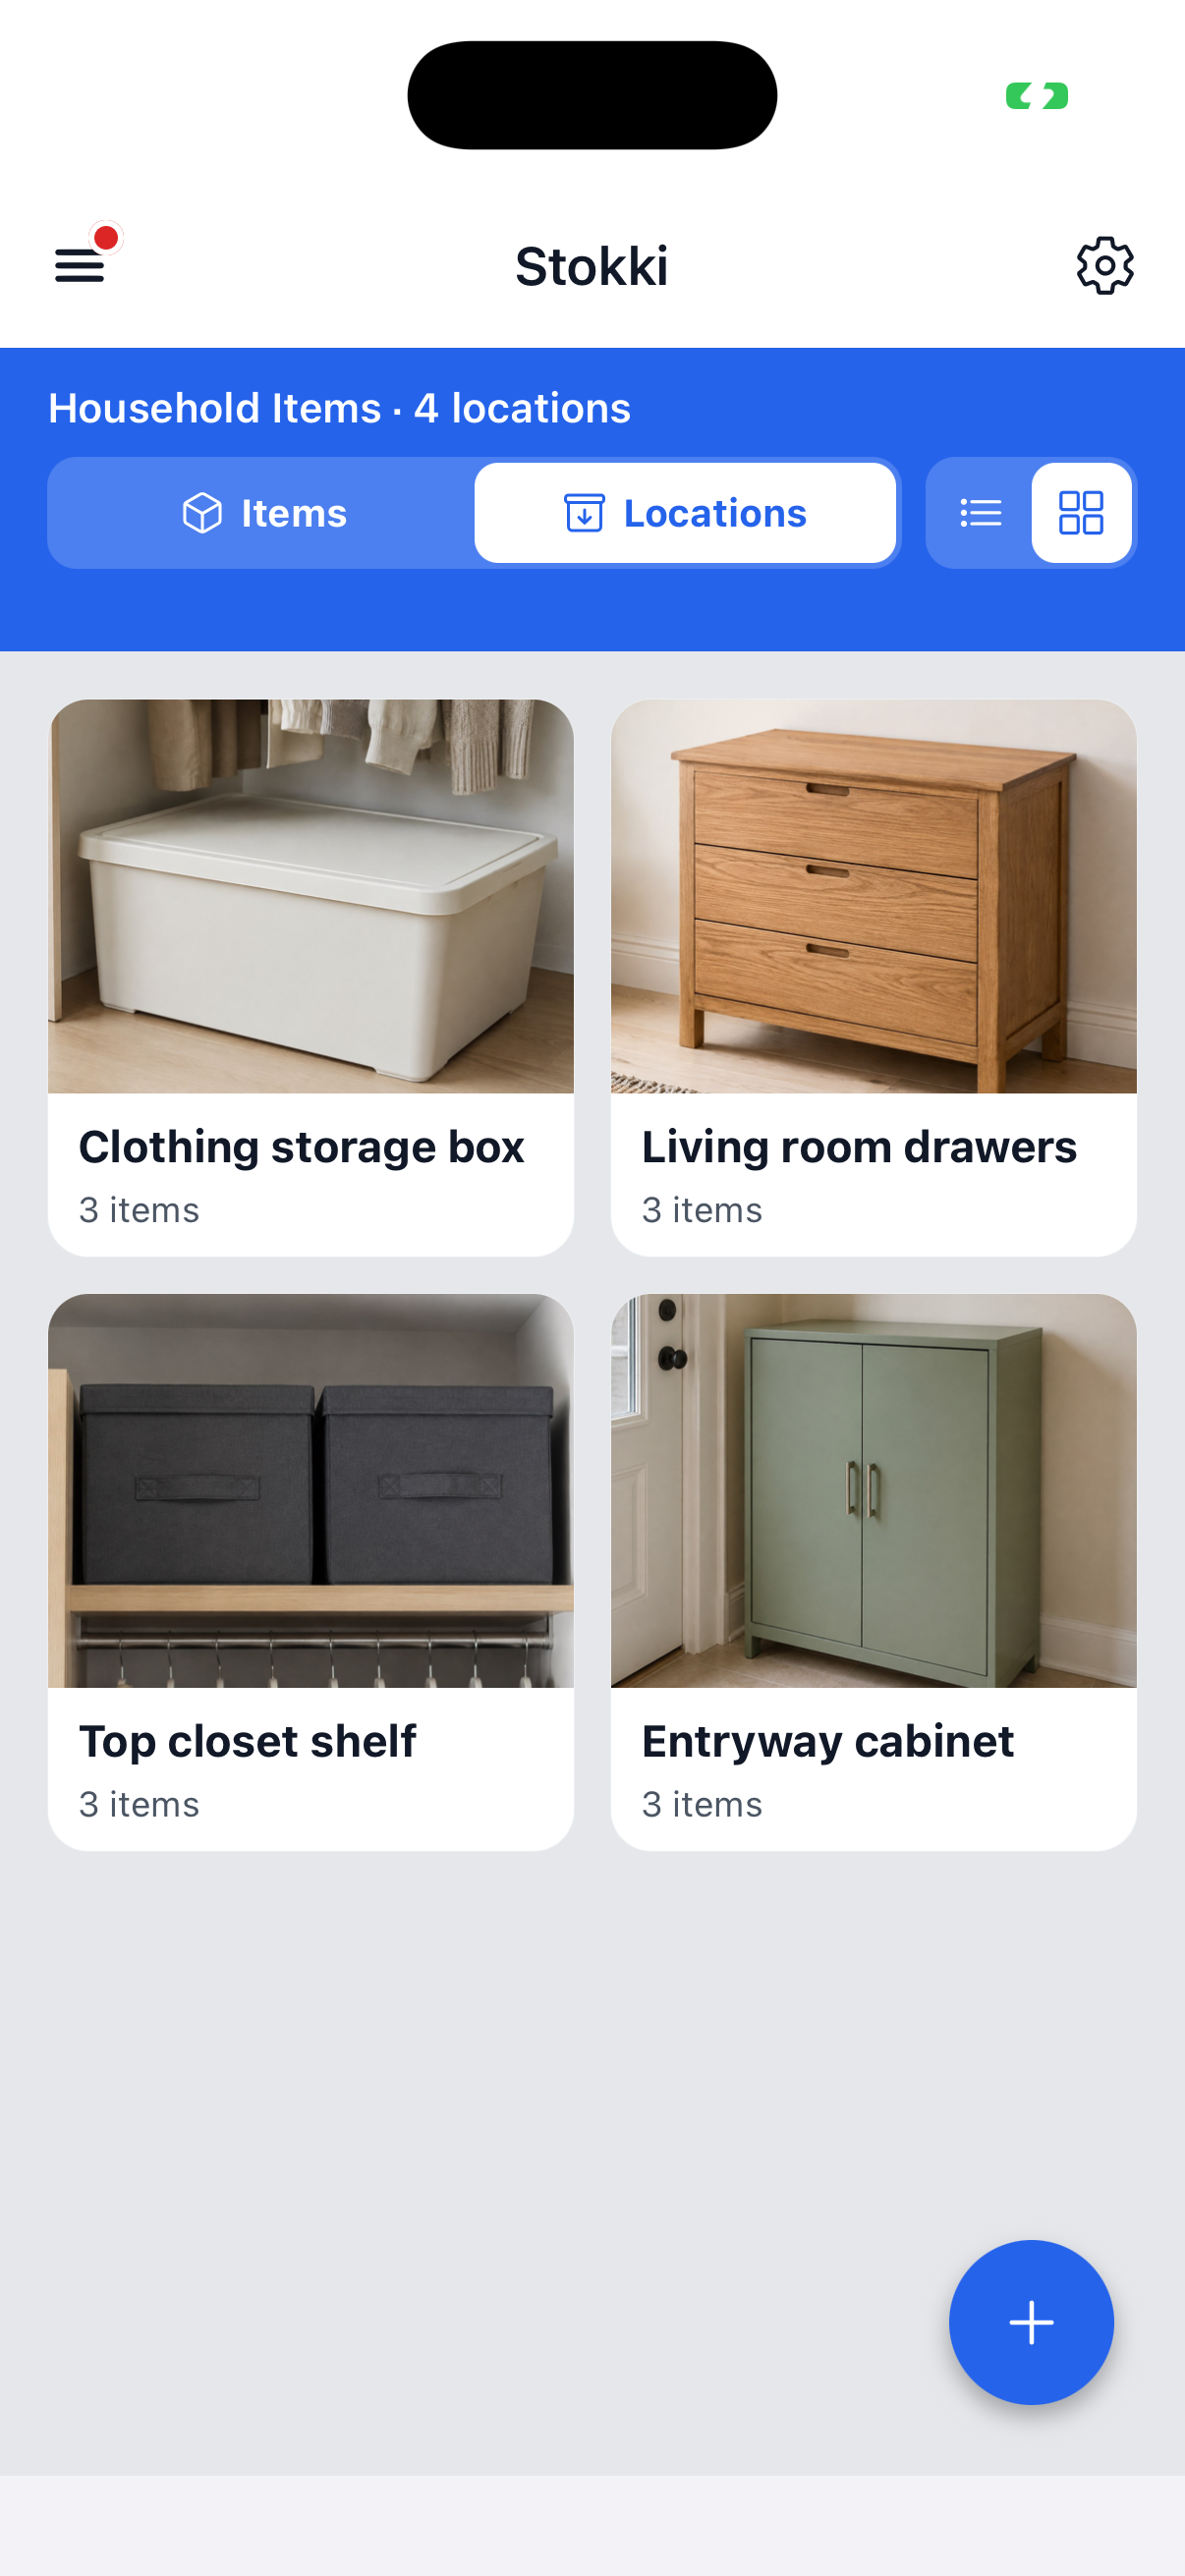
12
02Switch between list and grid views
Use the list to read details or the grid to find things by photo.
- Tap the horizontal-lines icon at the top right to use the list view.
- Tap the squares icon to use the grid view. You can change the layout in both items and locations.
View the grid screen ↗Back to contents ↑ 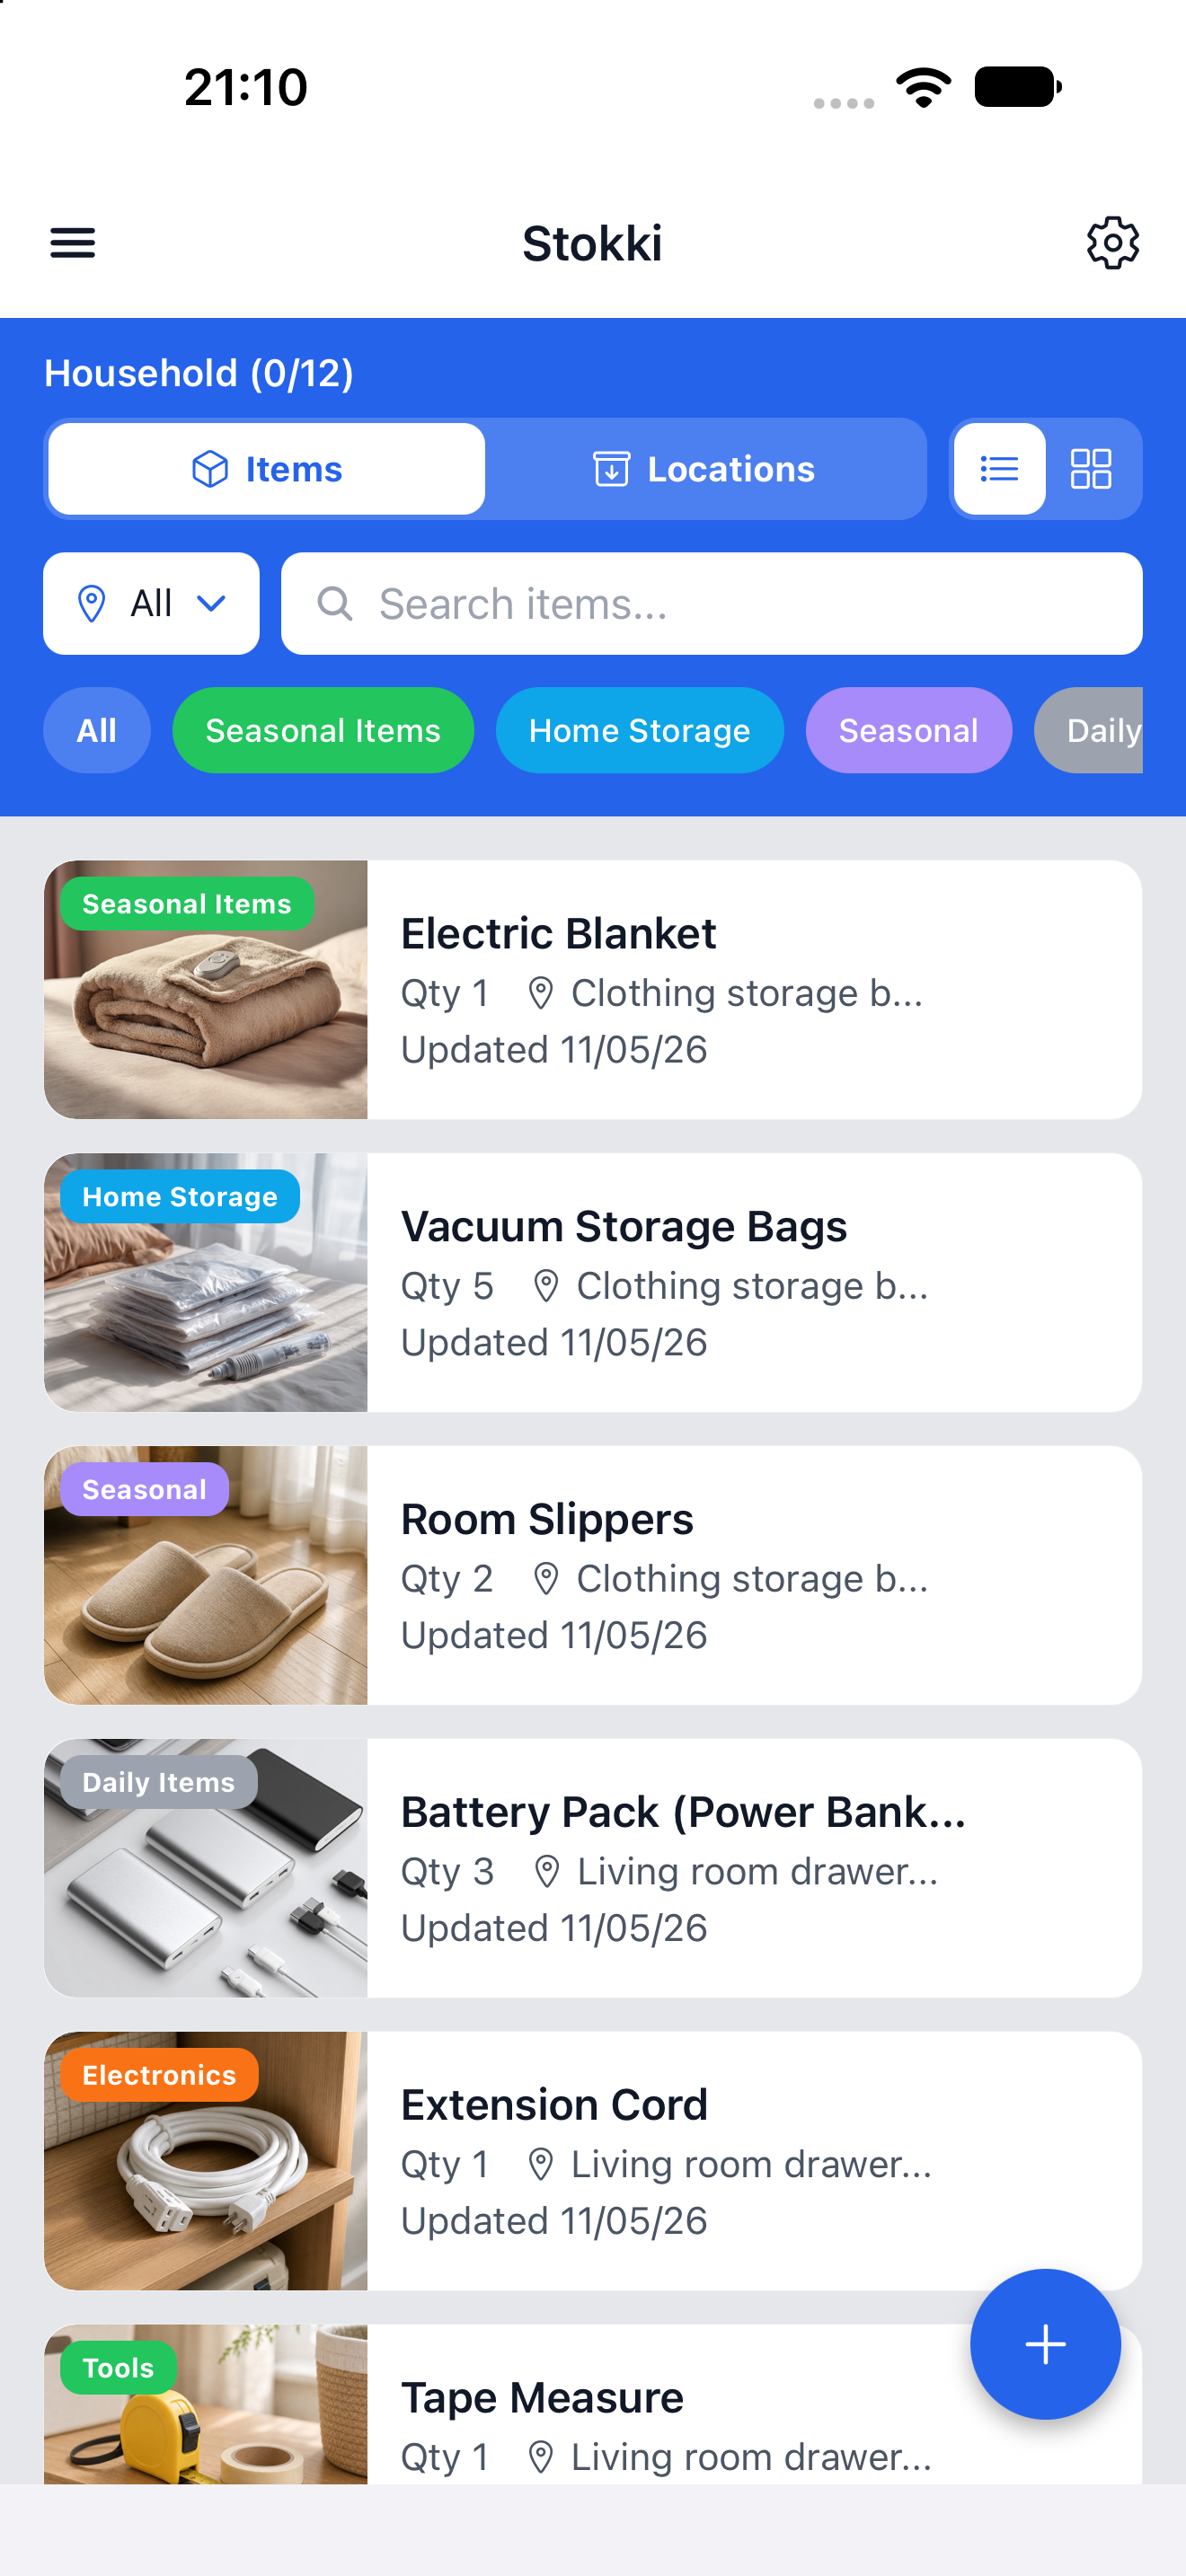
12
03Filter by storage location
Show only the items kept in a particular shelf, drawer or other place.
- In the items view, tap “All” beside the pin icon.
- Choose a storage location. Select “All” again to clear the location filter.
Back to contents ↑ 1
04Filter by label or category
Find items by a category such as tools or daily supplies.
- Tap a colored label below the search field. Swipe the labels sideways to reveal more.
- Select “All” to clear the category filter. You can combine categories with a location filter and name search.
Back to contents ↑ 12
05Swipe left to edit or delete
In the item list, you can act directly on a card.
- Switch the items view to the list layout.
- Swipe the item card to the left to reveal “Delete” and “Edit”, then tap the action you need.
In grid view, open the item details instead. Check which item is being deleted before confirming.
Back to contents ↑ Swipe across a card from right to left to reveal its actions.Tap the image to see the full screen02
Folders
06Open the folder list
Switch between inventories for home, a vehicle, hobbies and more.
- Tap the three-line menu at the top left of the home screen.
- Tap a folder name to open that folder’s home screen.
Back to contents ↑ 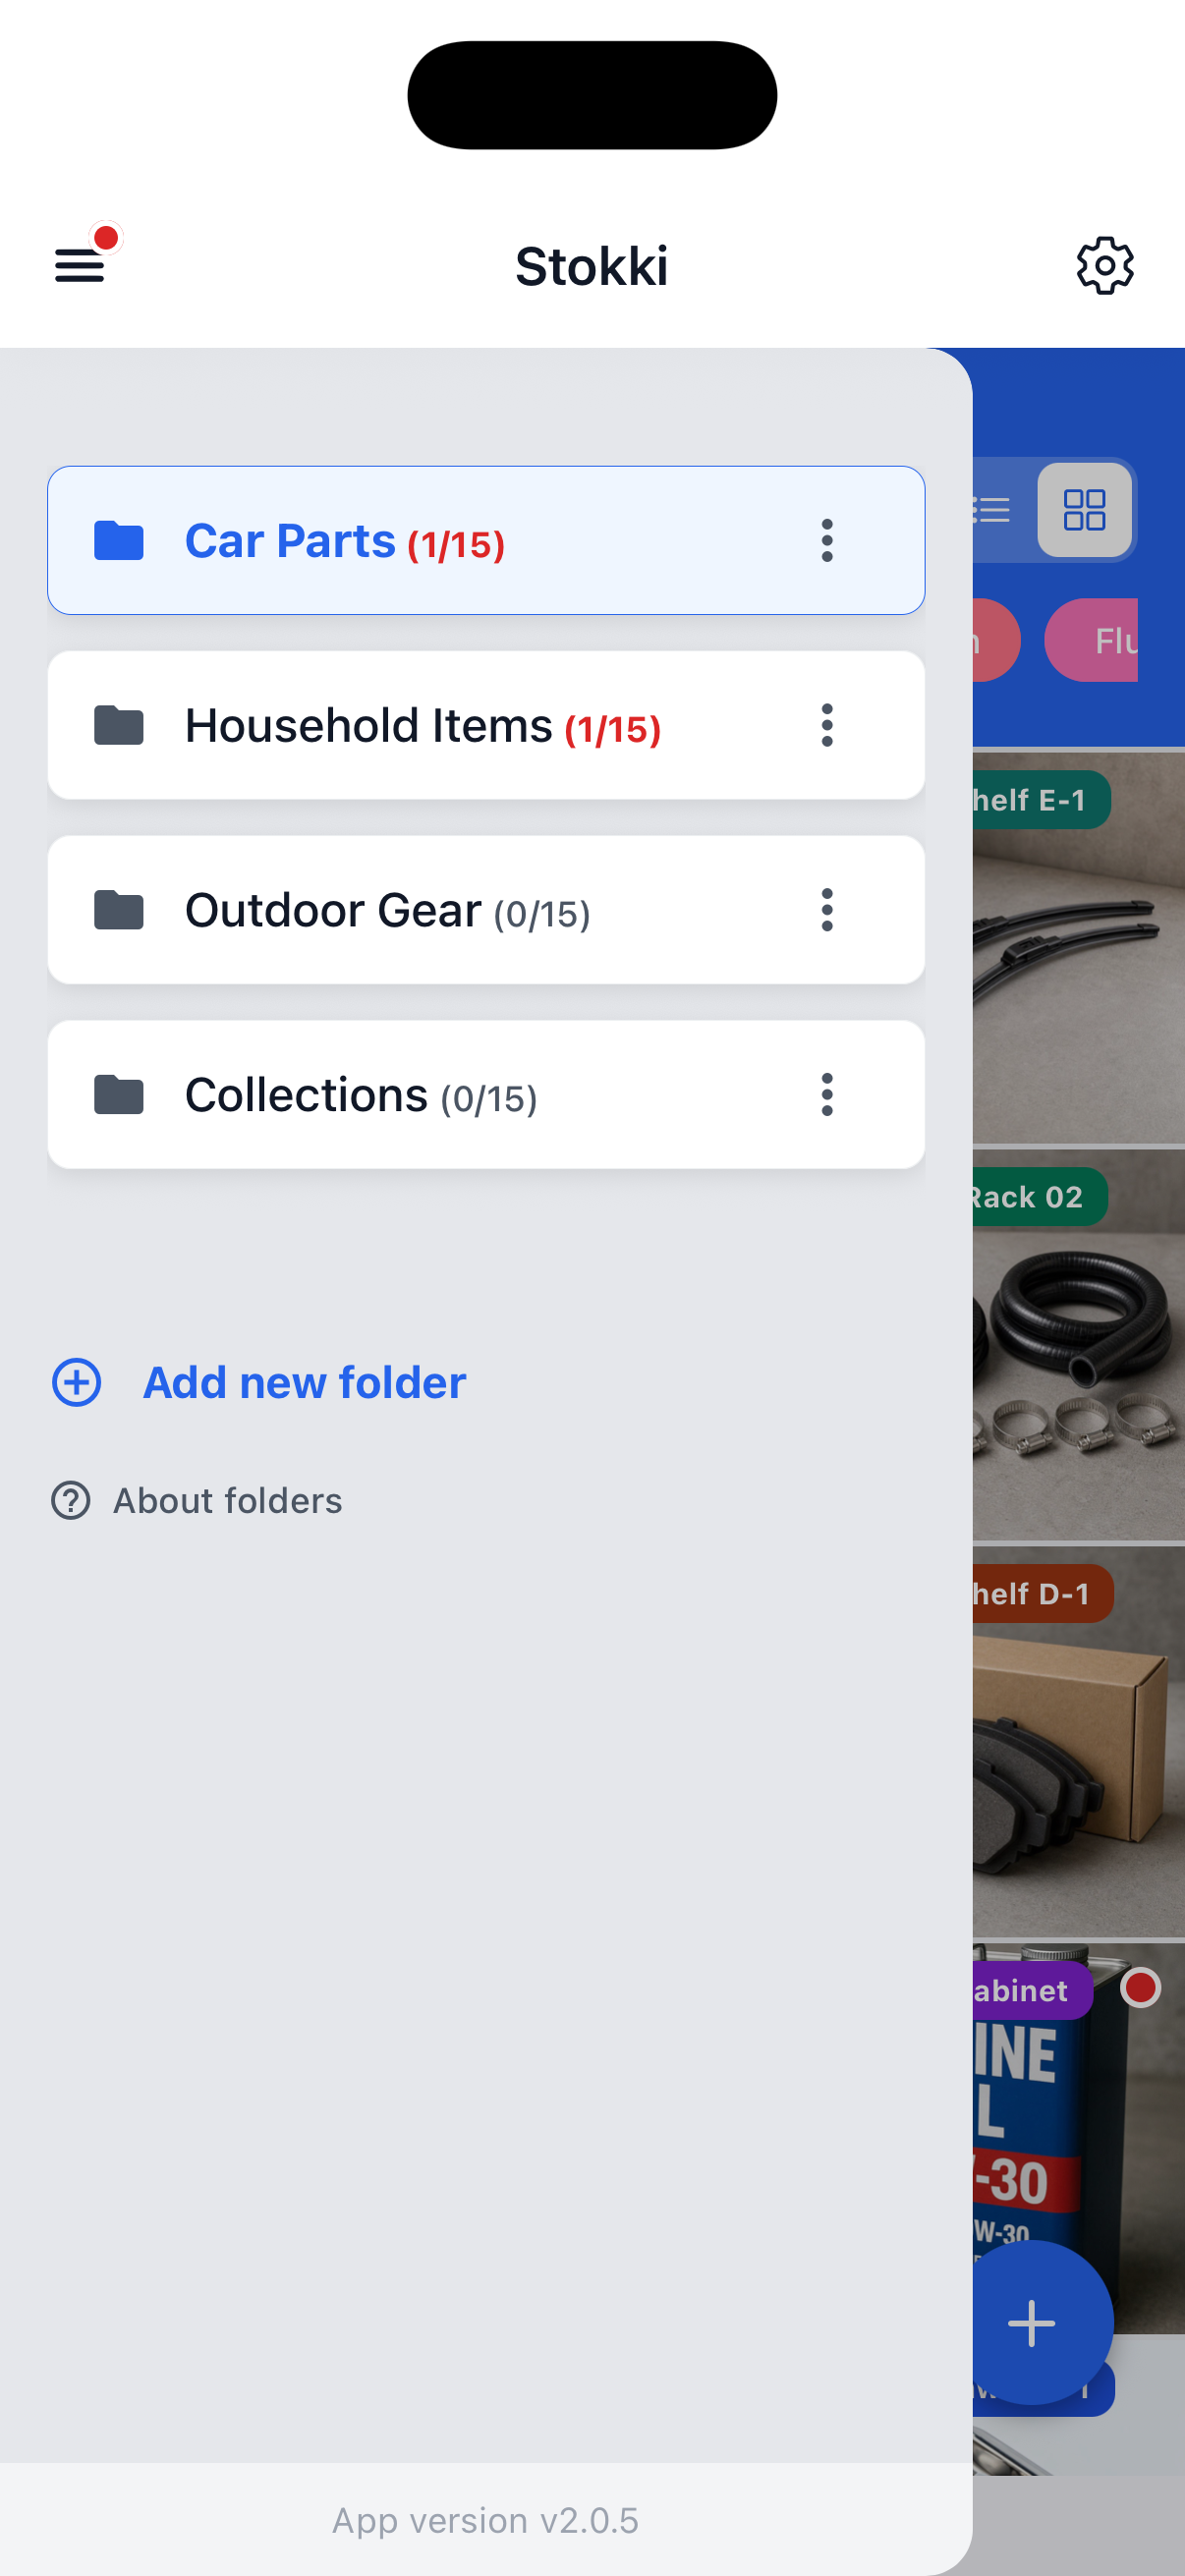
12
07Add a folder
Create a new group of items to manage separately.
- Tap “Add new folder” in the folder list.
- On “What are you organising?”, select a purpose card and tap “Continue”.
- Set the folder name, storage locations and categories, then create the folder.
View the folder creation screen ↗Back to contents ↑ 1
08Rename or delete a folder
Use the three-dot menu next to each folder.
- Tap “⋮” to the right of the folder you want to manage.
- Choose “Rename” or “Delete” and follow the on-screen instructions to confirm.
Deleting a folder also affects its contents. Check the target folder carefully.
Back to contents ↑ 1
03
Adding items and viewing details
09Add an item
Start with the “+” button at the bottom right of the home screen.
- Tap “+” to open the new-item screen.
- Add a photo and enter the category, storage location and other details you need, then tap “Save”.
To add items without a photo, turn on “Allow items without photos” in settings.
Back to contents ↑ 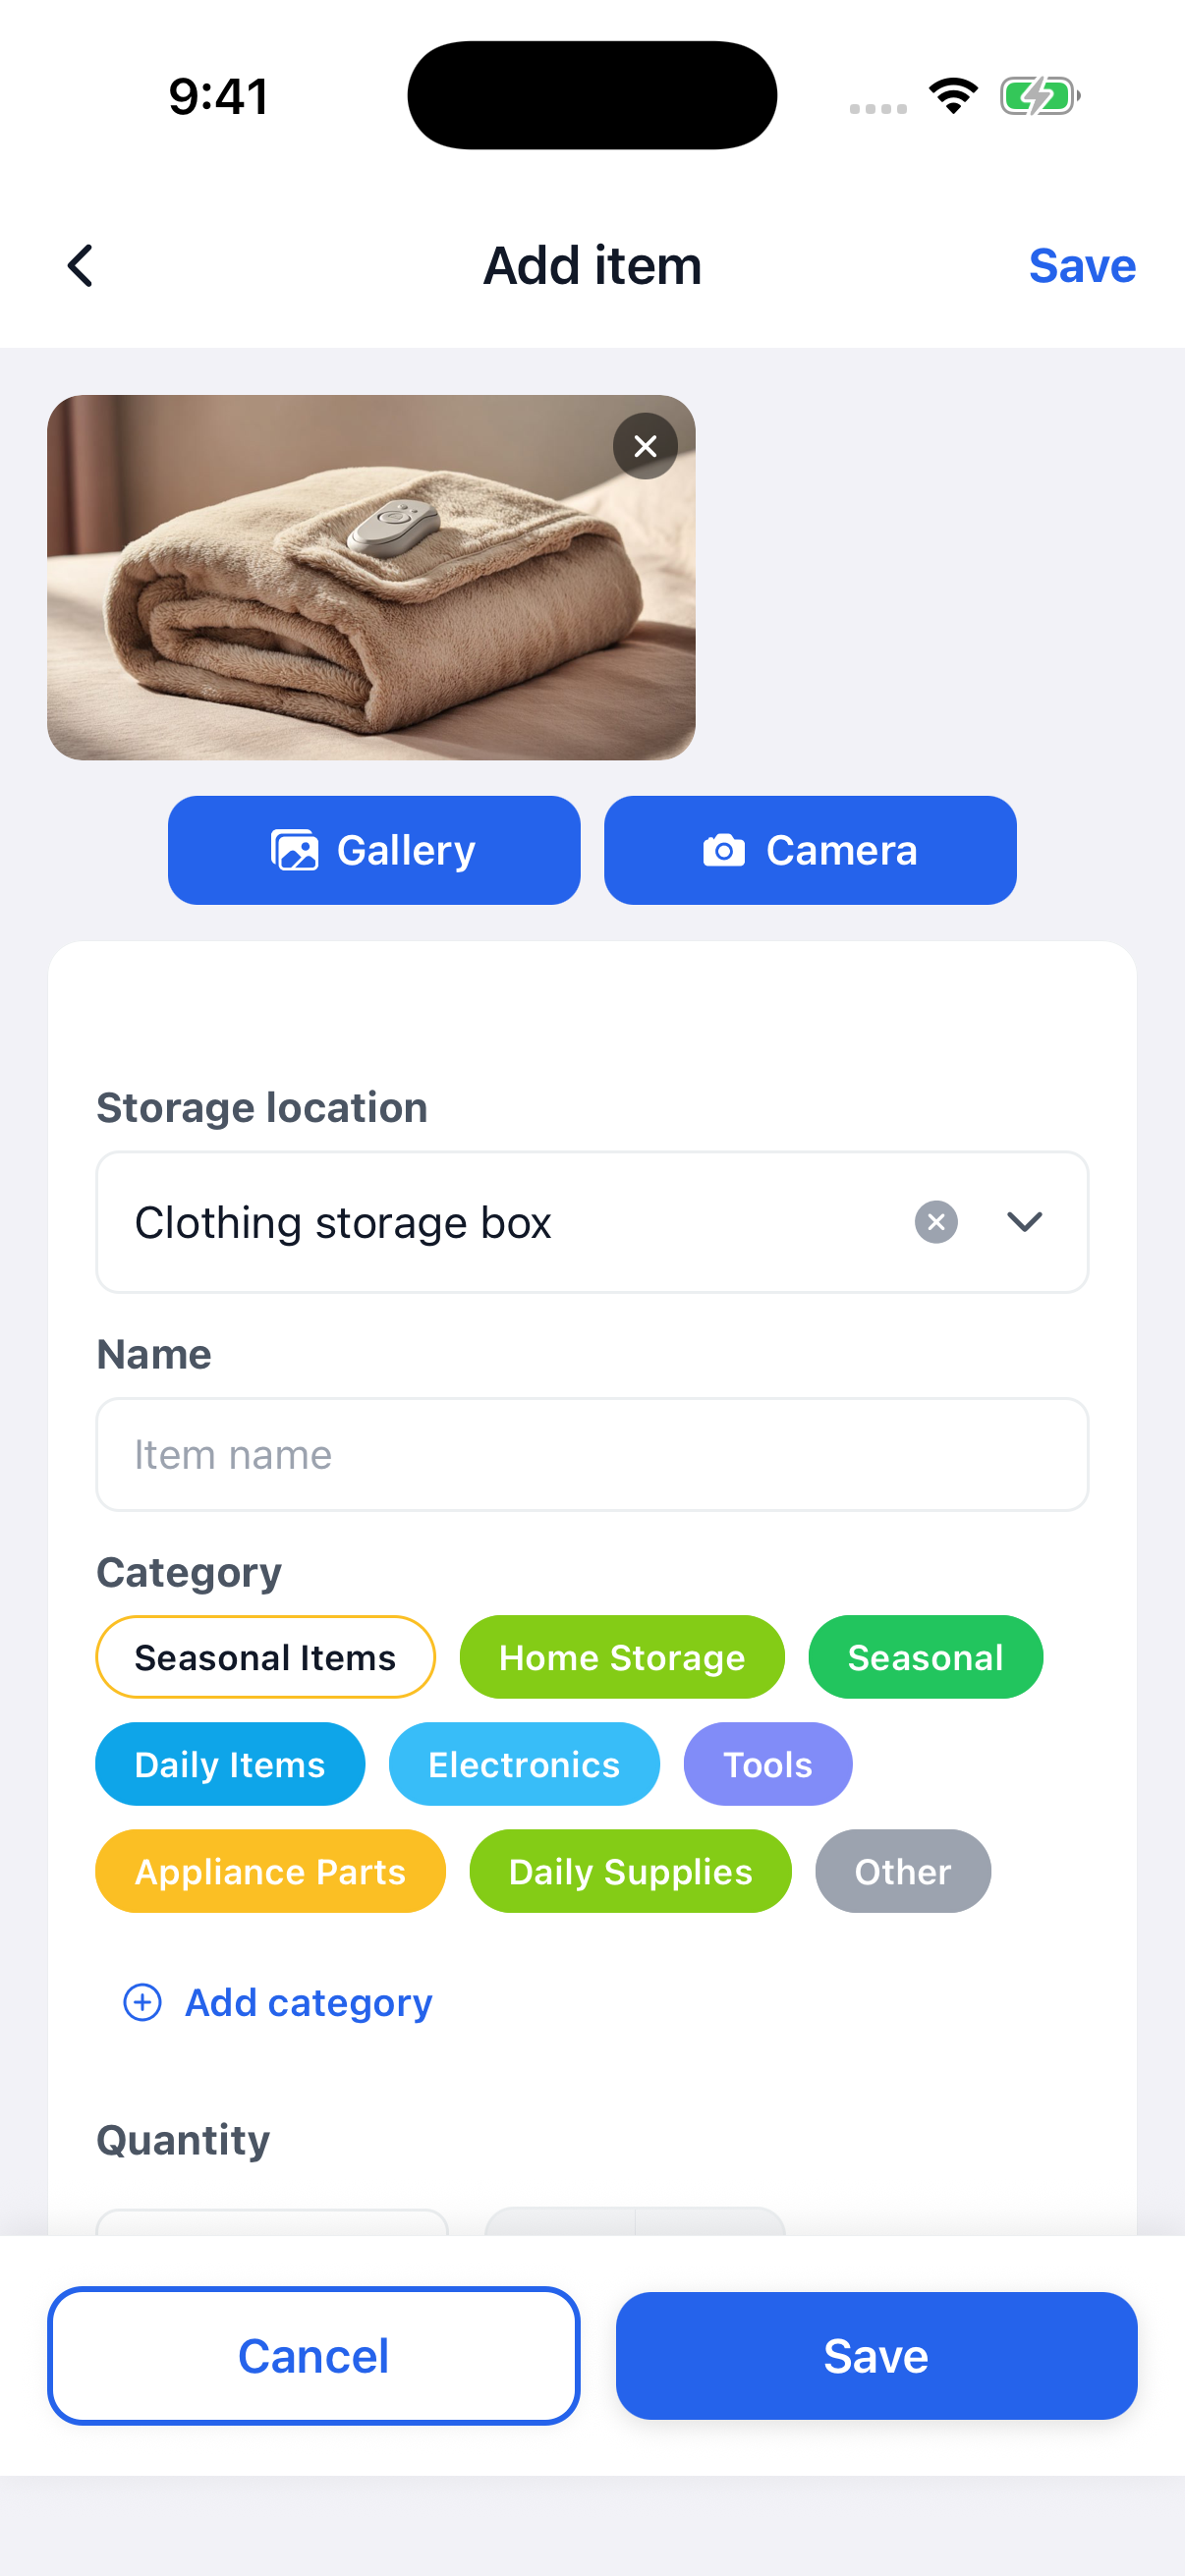
2
10Swipe through multiple photos
Open an item from the list to see its photos and saved details.
- Tap an item on the home screen to open its details.
- If it has multiple photos, swipe the photo at the top left or right to move between them.
An item with only one photo has no other photo to switch to.
Back to contents ↑ Swipe the top photo left or right. This example has one saved photo.Tap the image to see the full screen11Edit or delete from item details
There are two ways to reach editing.
- Tap the edit icon inside the information card to open the editor directly.
- Open “⋮” at the top right to choose “Edit” or “Delete”. Deletion requires confirmation.
Back to contents ↑ 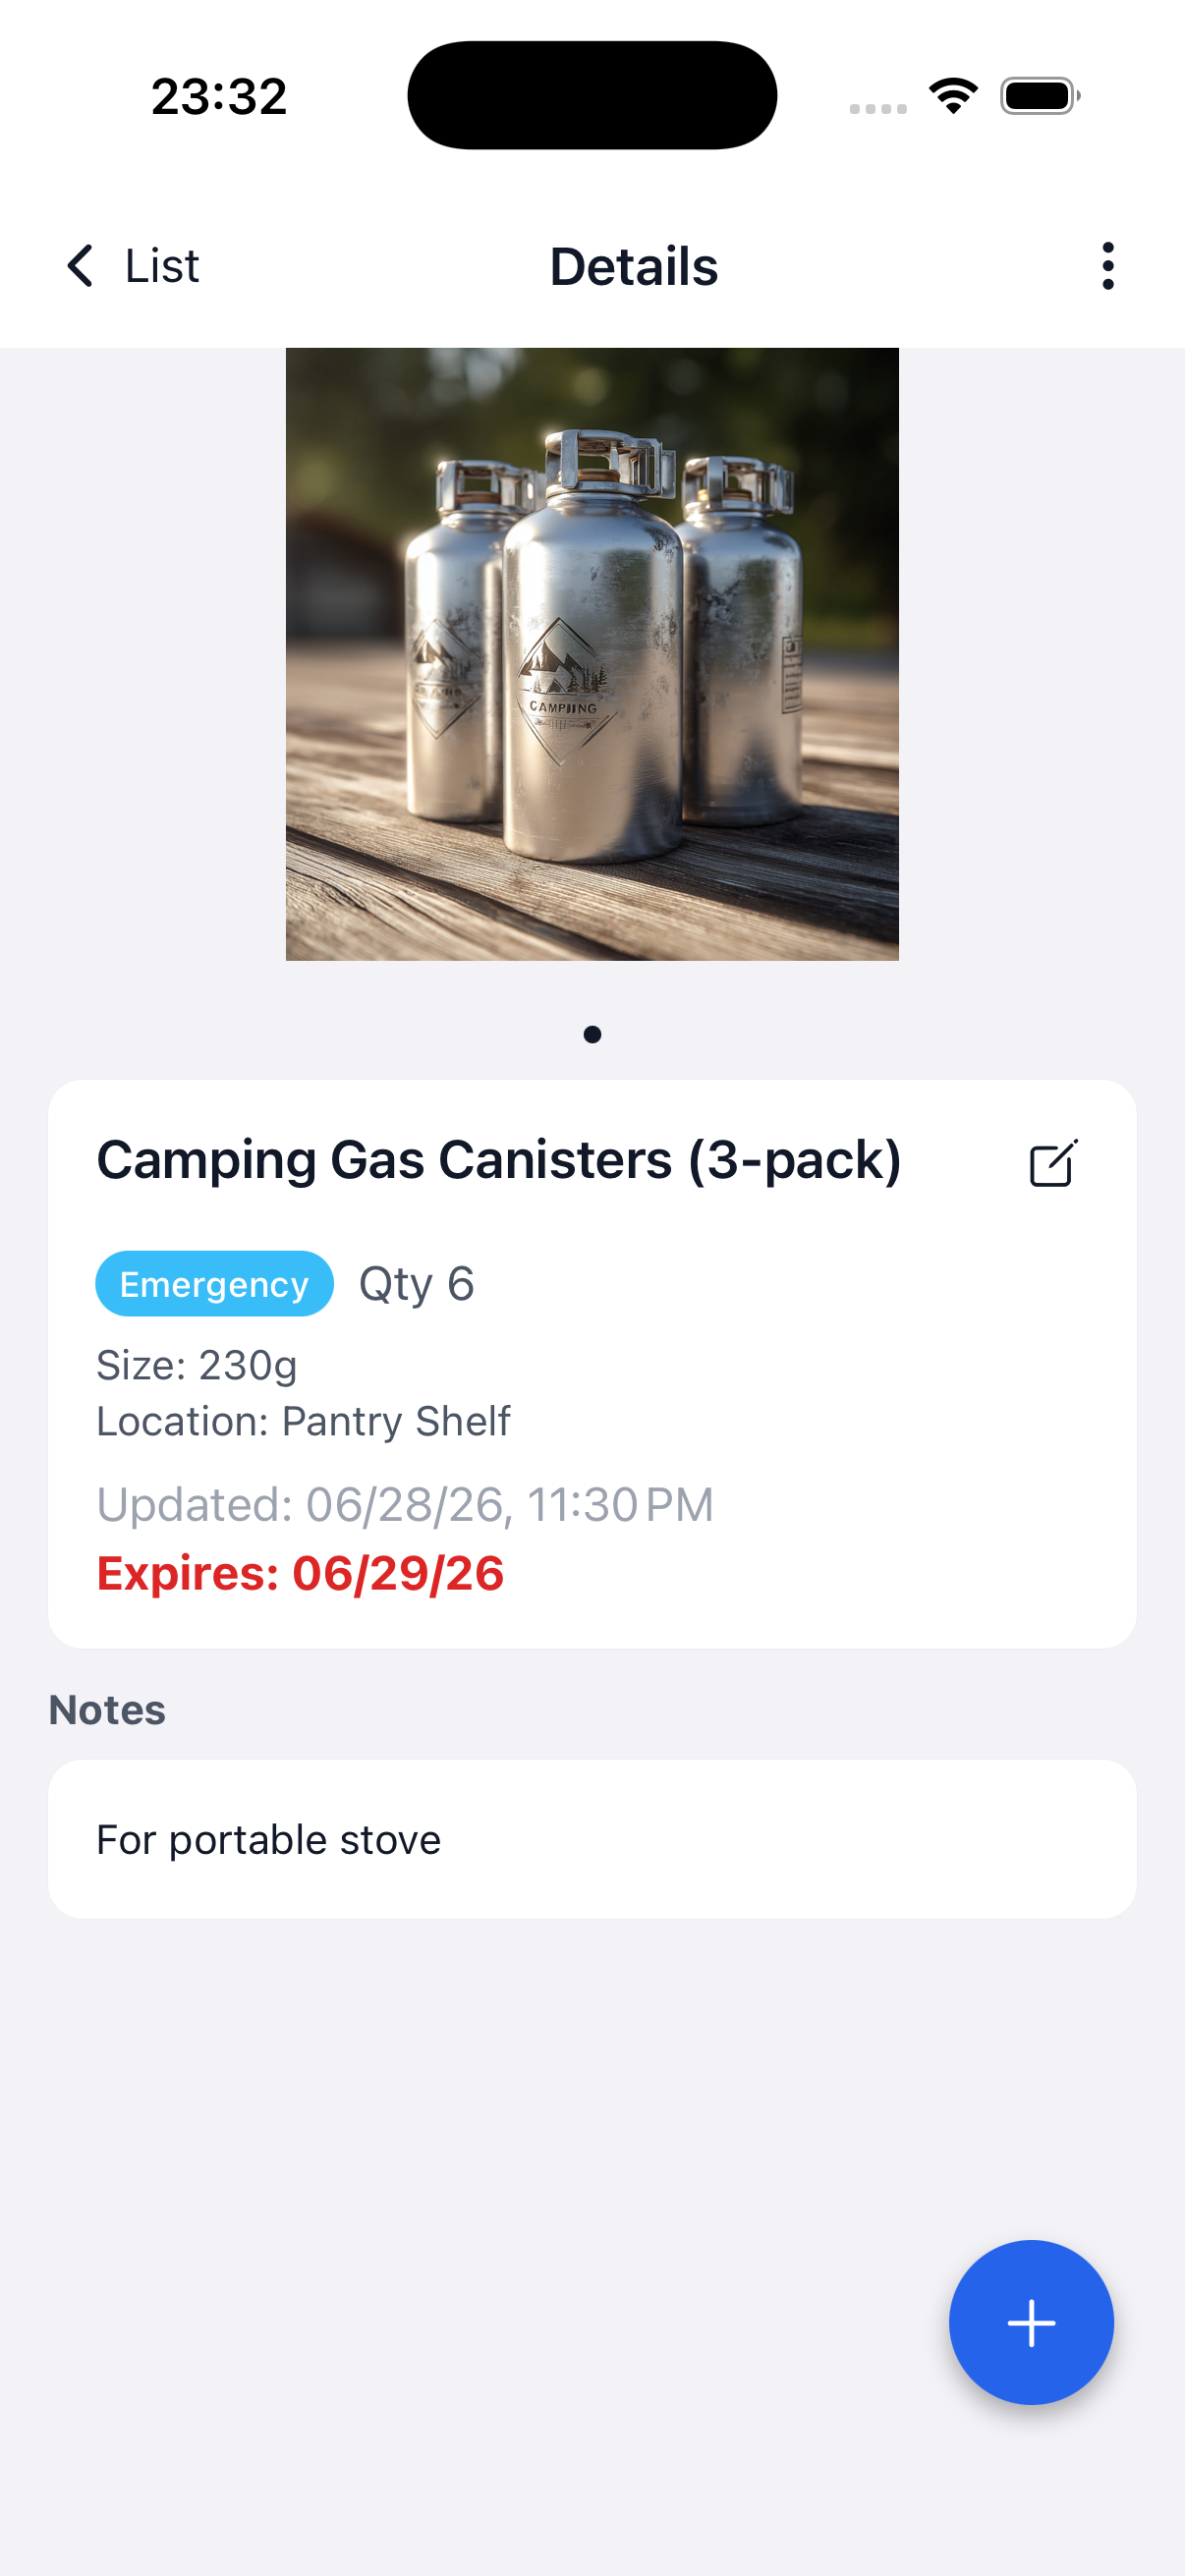
12
04
Settings
12Open settings
Use the gear icon at the top right of the home screen.
- Tap the gear icon at the top right.
- Language and color style apply to the whole app. Notifications, photo requirements, categories and storage locations apply to the current folder.
View the settings screen ↗Back to contents ↑ 1
13Change the language
Choose the language used in the app.
- Open “Language” in settings.
- Tap the language you want. A checkmark appears and the display language changes.
Back to contents ↑ 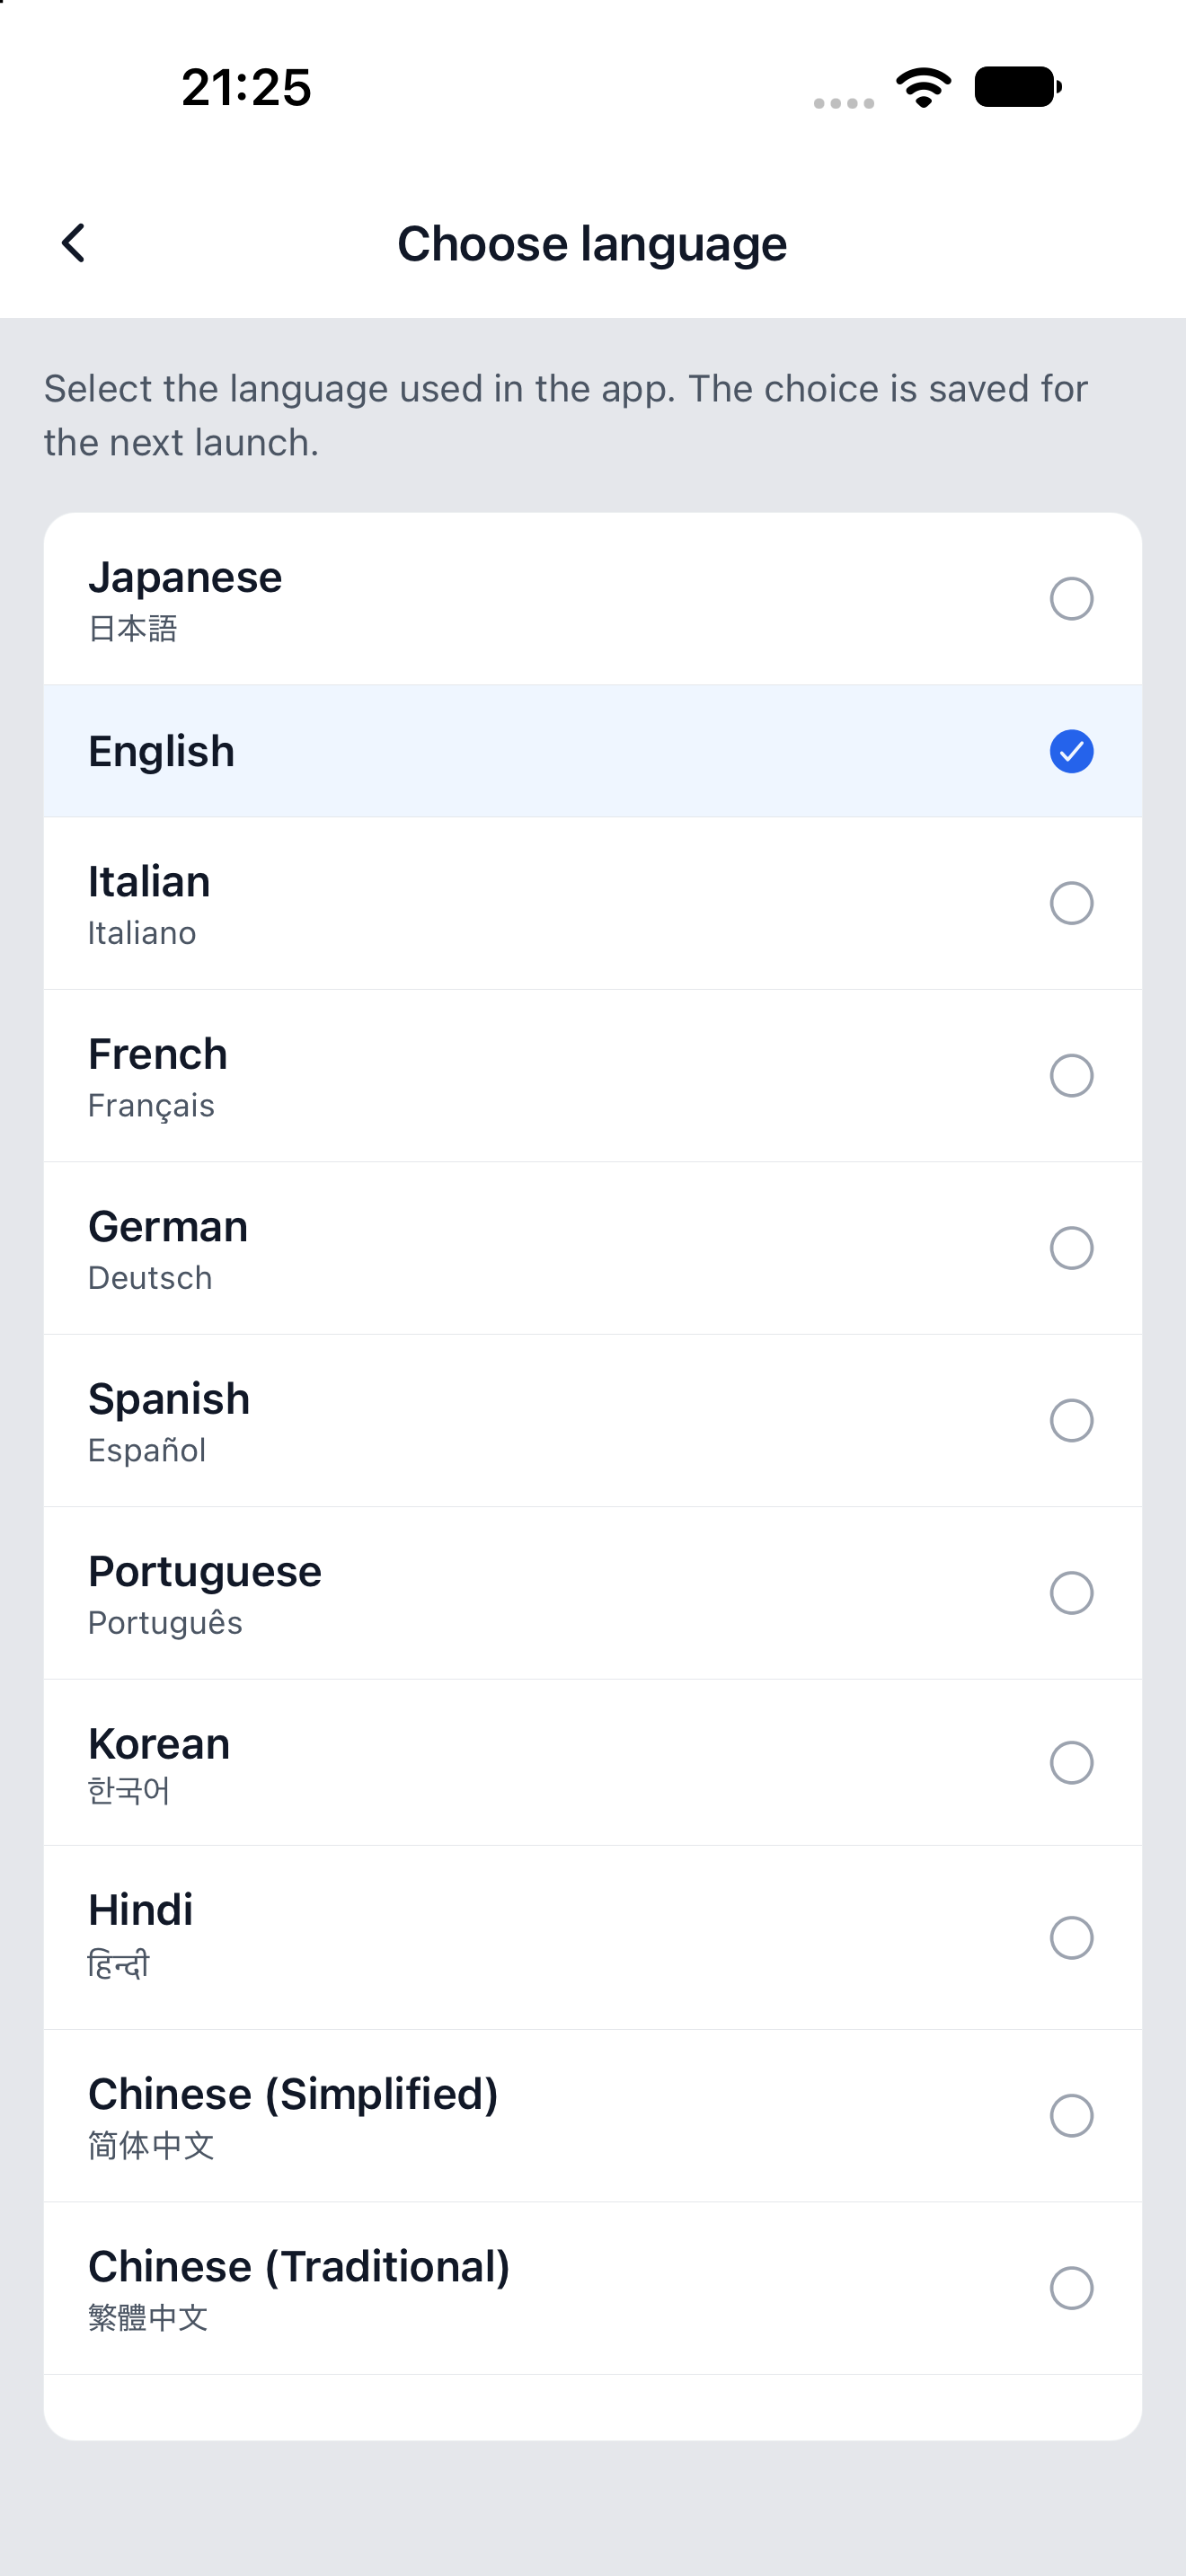
2
14Change the color style
Choose light, dark or the device’s system setting.
- Open “Color Style” in settings.
- Tap “Light”, “Dark” or “Match system”. The system option follows your device’s appearance setting.
Back to contents ↑ 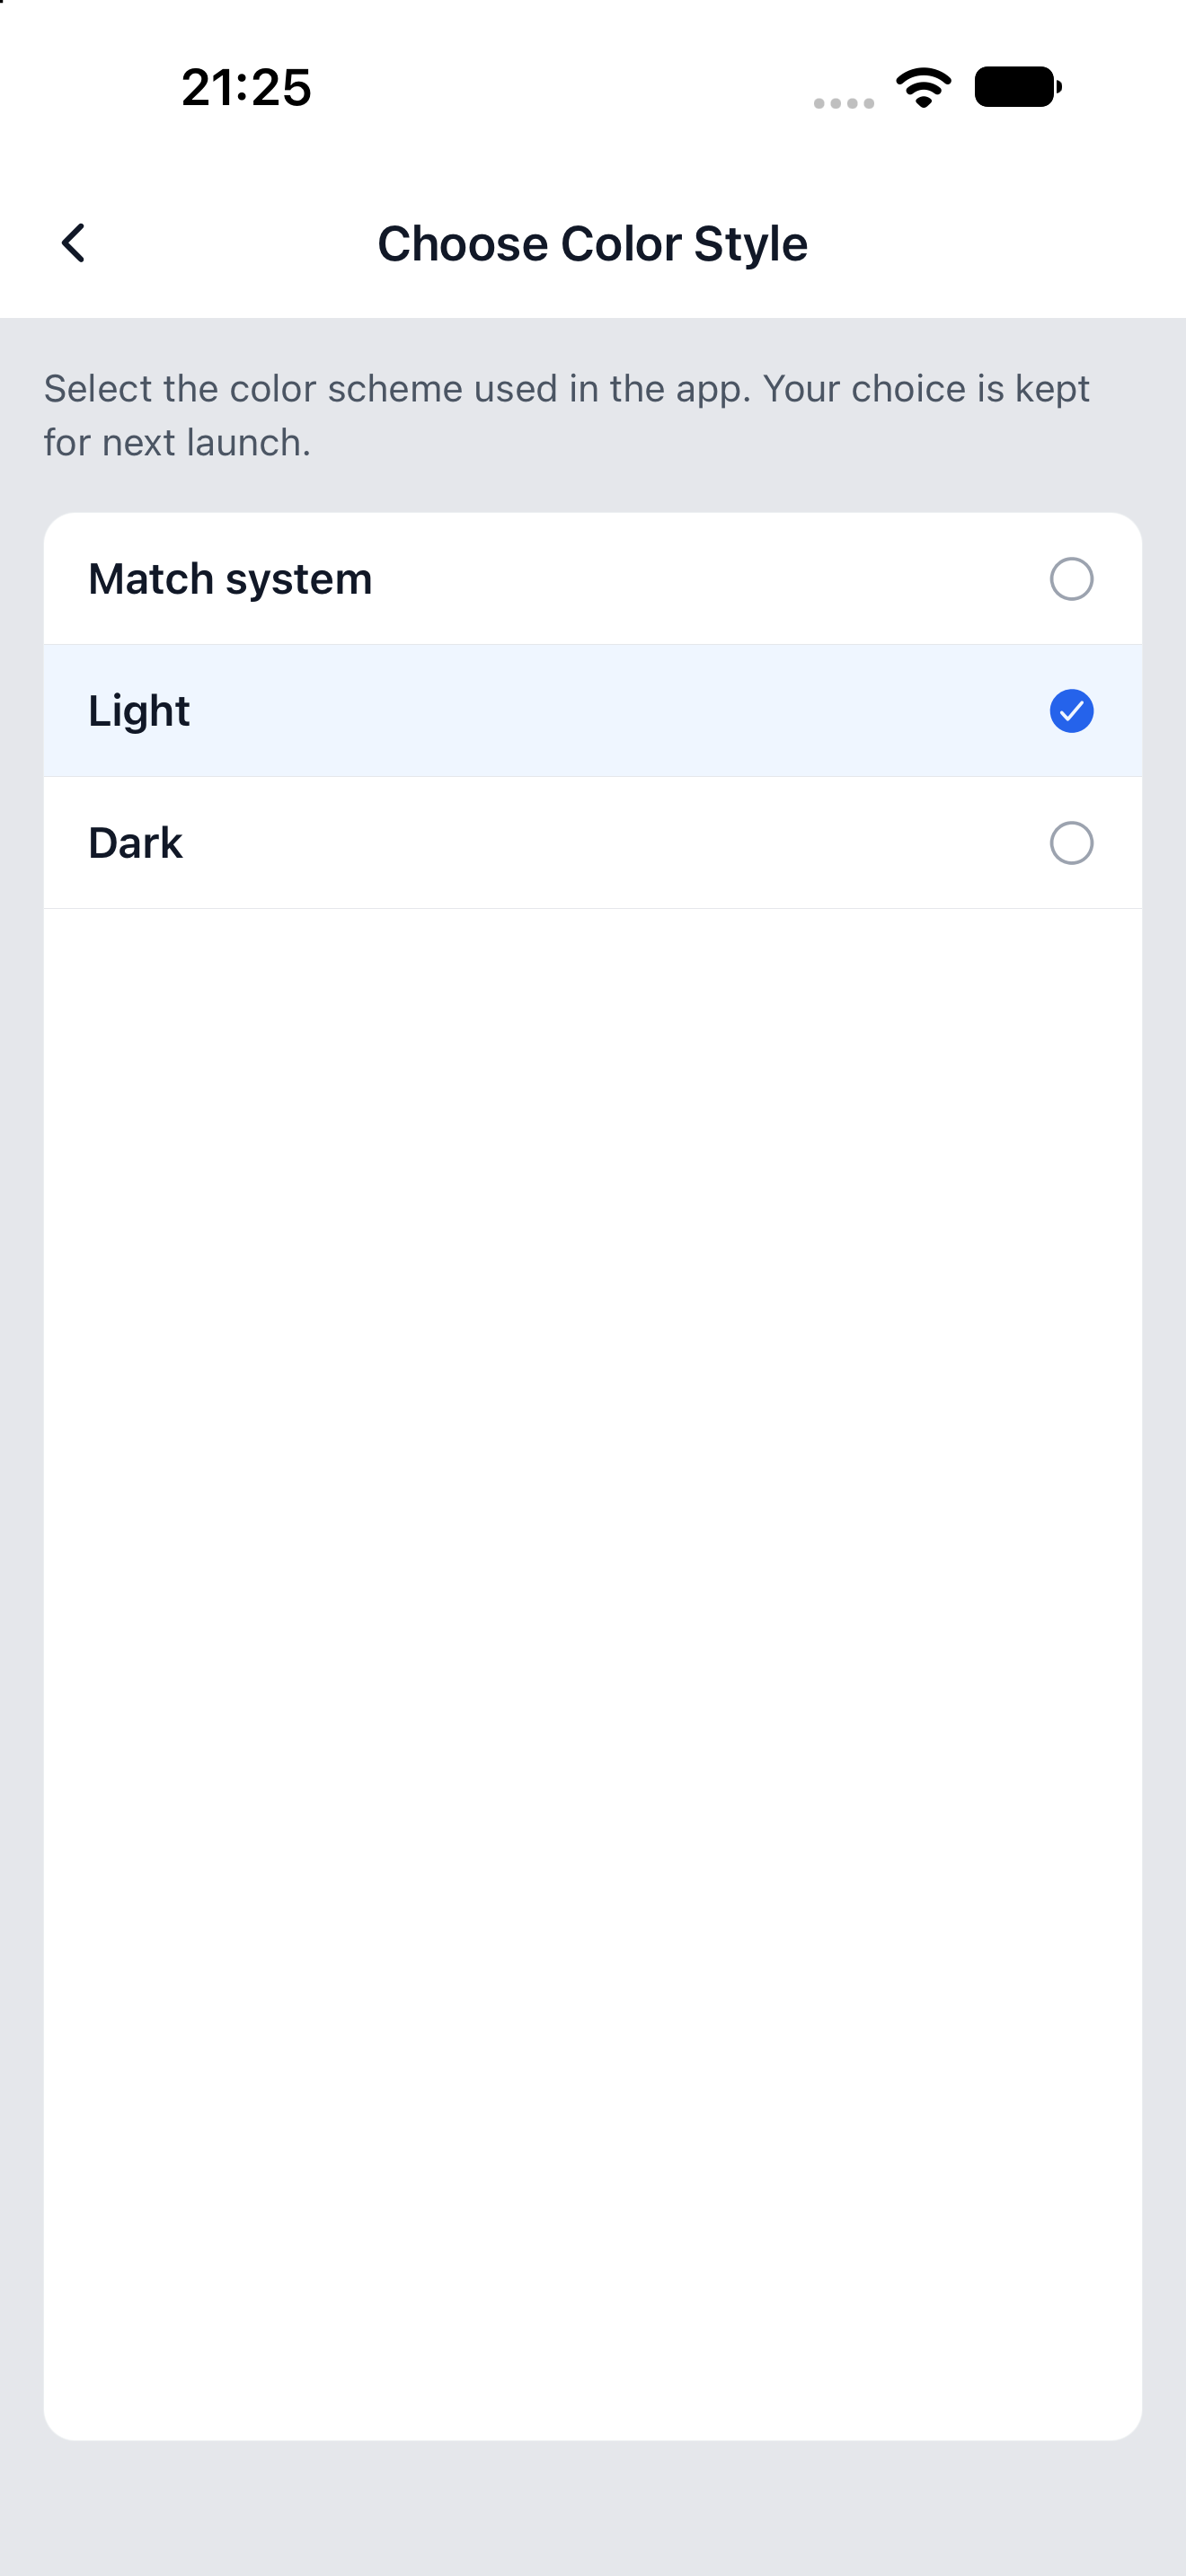
2
15Optimize storage
Clean up images that the app no longer uses.
- Open “Storage optimisation” in settings and check the stored-image information.
- Read the explanation, tap “Optimise storage” and follow the on-screen instructions.
This is separate from backing up. Use “Backup and restore” to keep a copy of important data.
Back to contents ↑ 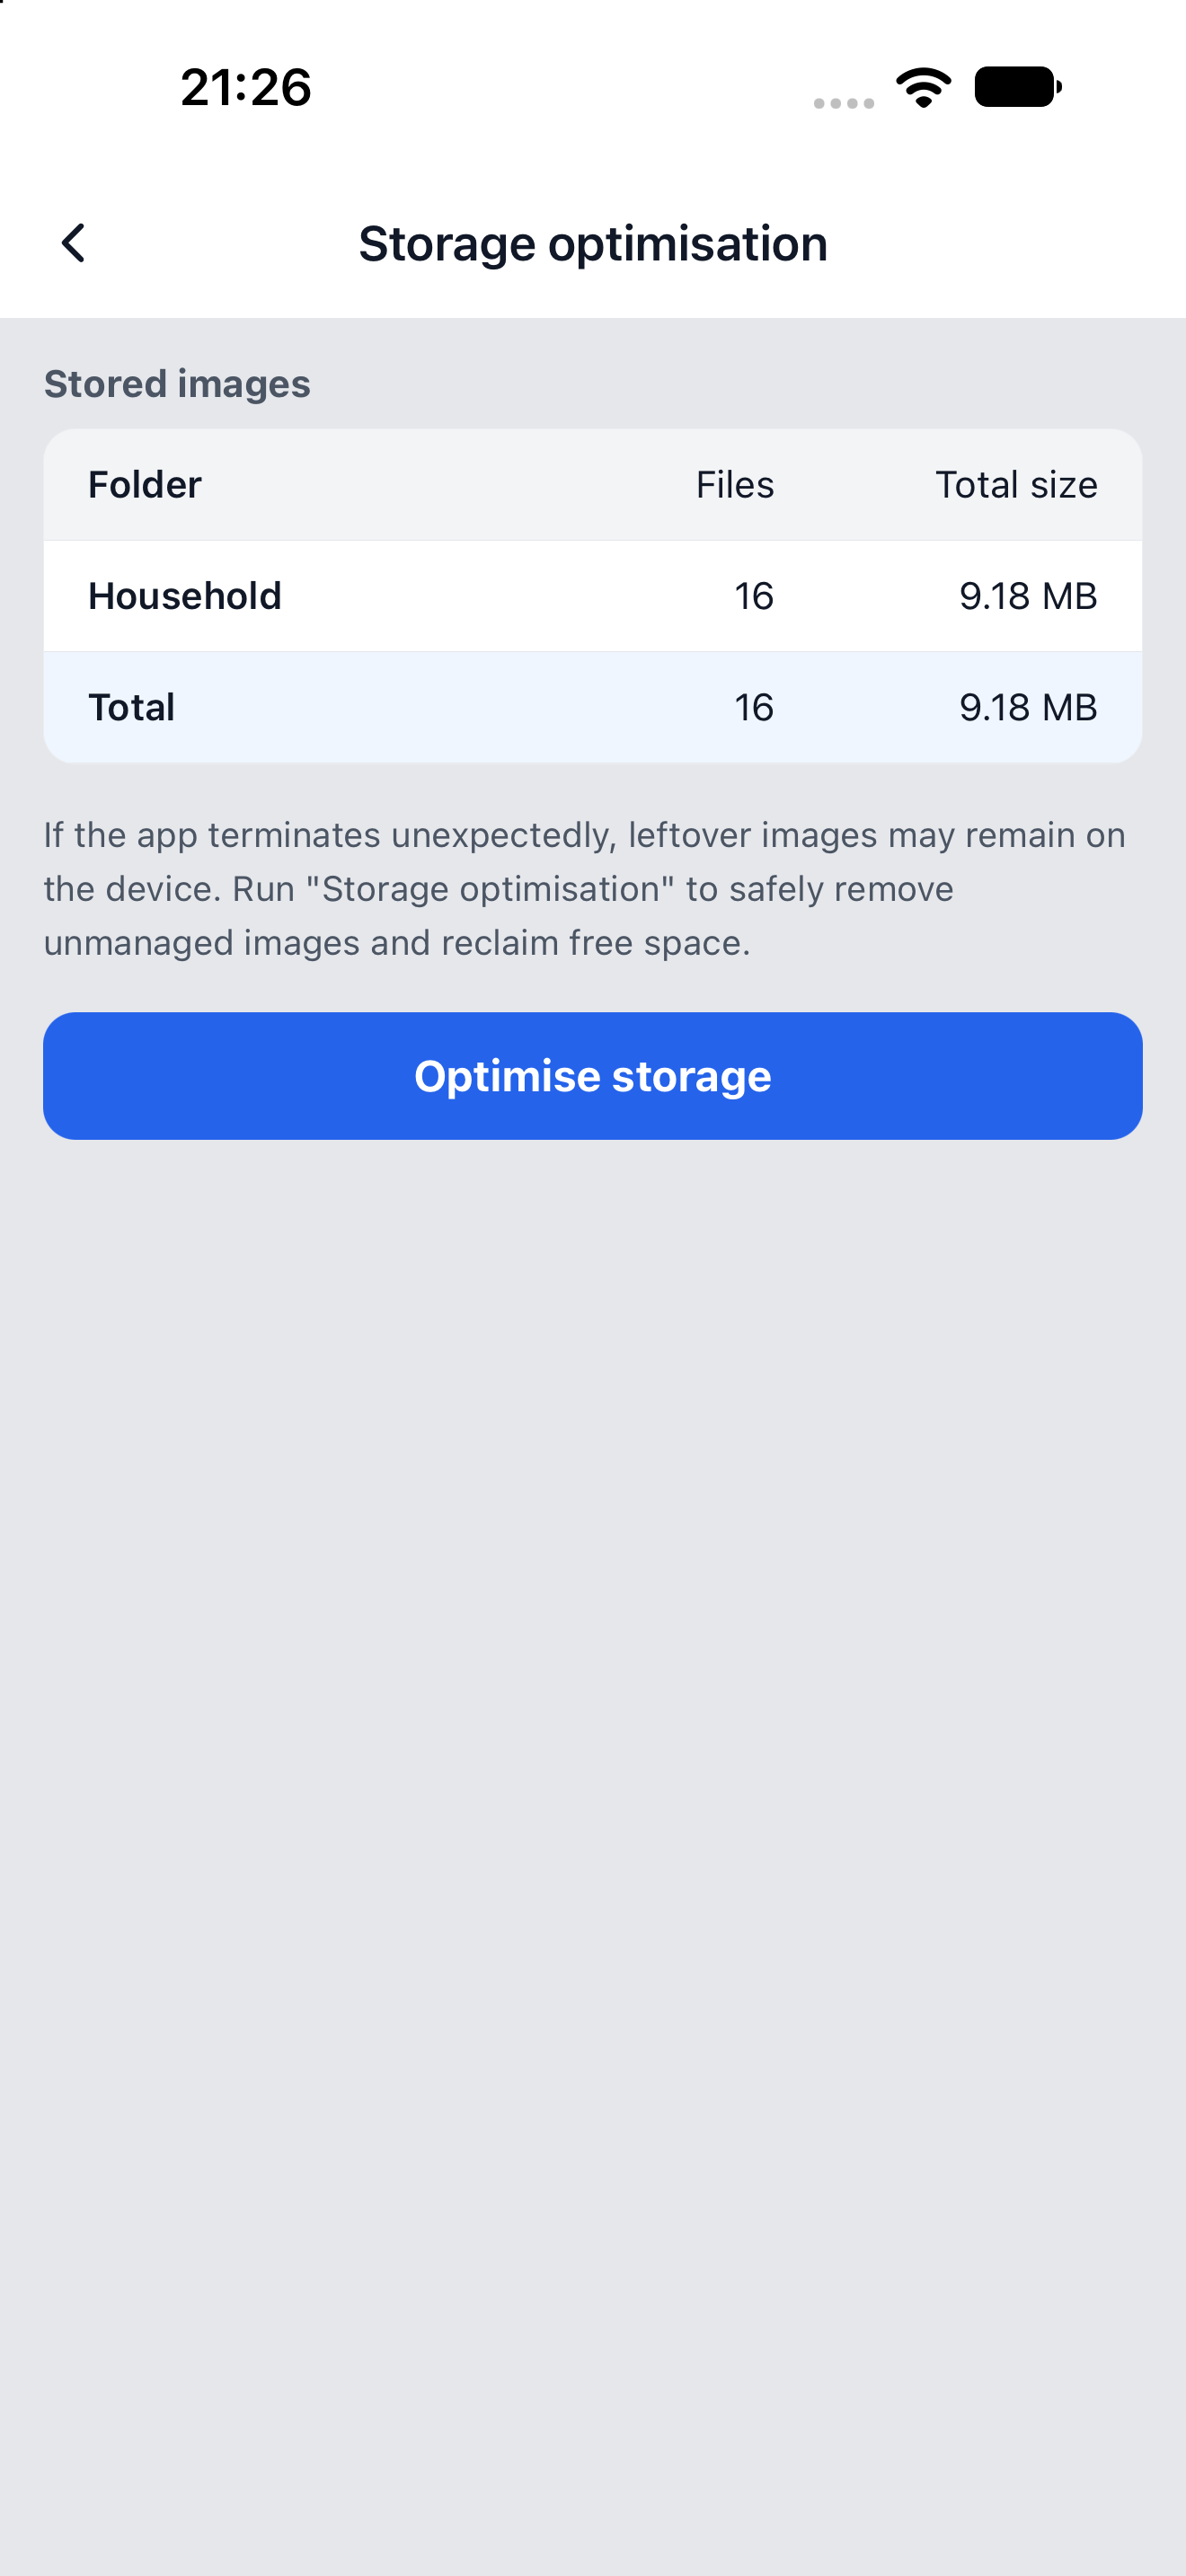
2
16Set expiration reminders
Adjust expiration notifications for the current folder.
- In settings, open “Notifications” under “Folder settings”.
- Open “First notification” and “Second notification” to choose when each reminder is sent.
Your device must allow notifications. Add an expiration date to an item to use reminders.
Back to contents ↑ 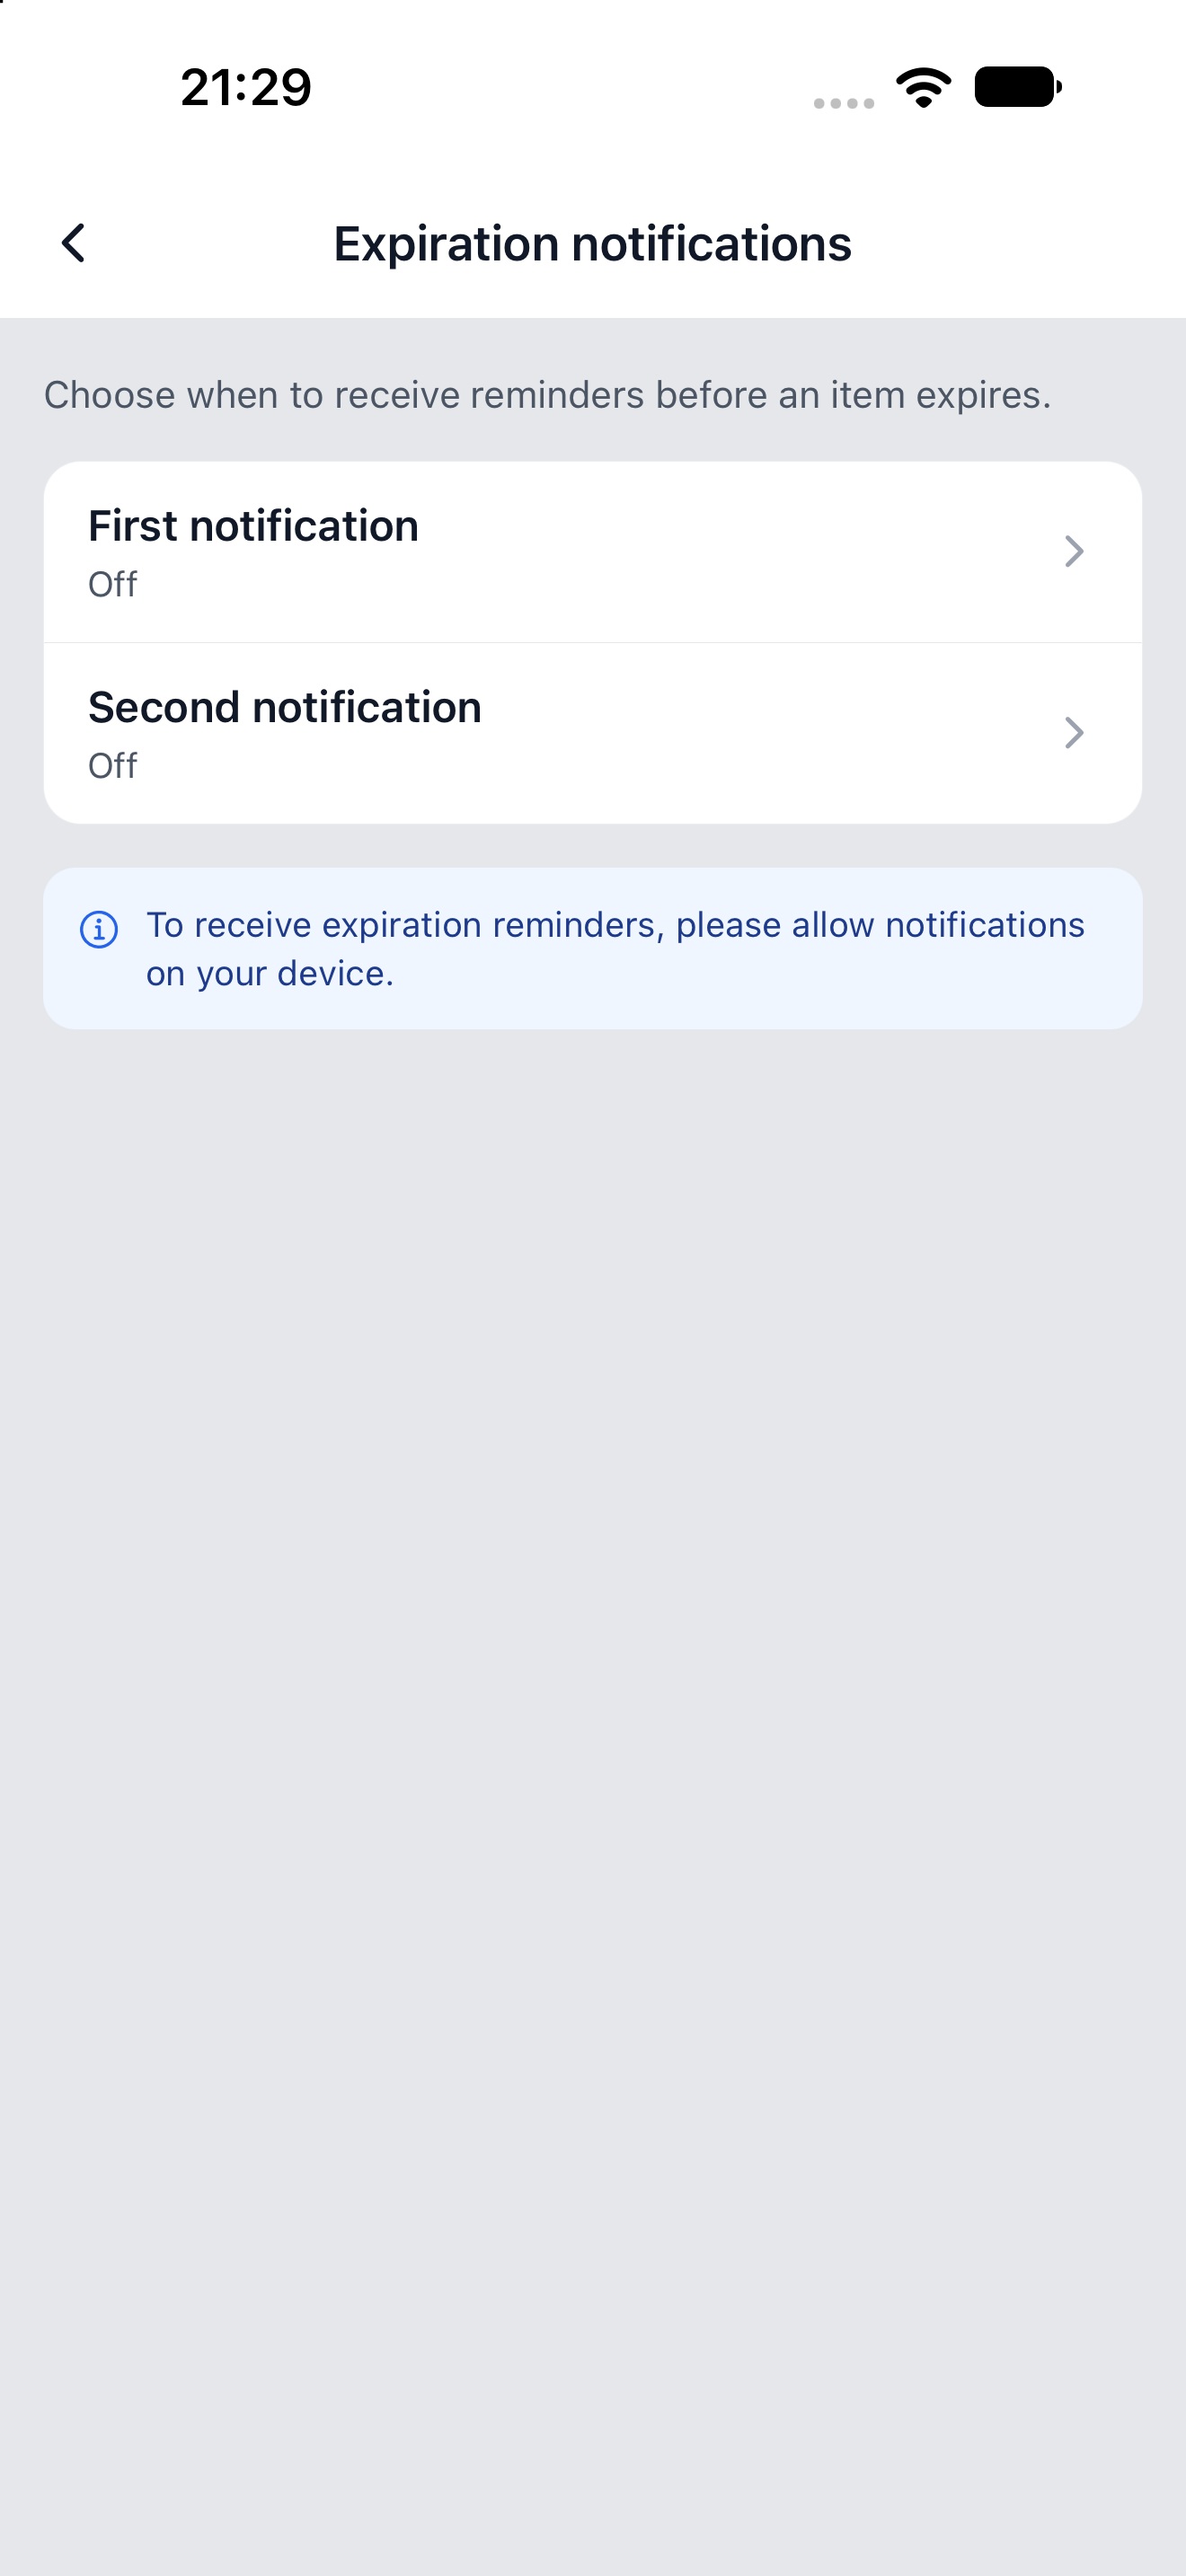
2
17Allow items without photos
Register an item now, even if you do not have its photo yet.
- Open the relevant folder, then go to “Folder settings” in settings.
- Turn on “Allow items without photos”. You can then save items in that folder without attaching a photo.
This setting is per folder. Enable it separately in any other folder where you need it.
Back to contents ↑ 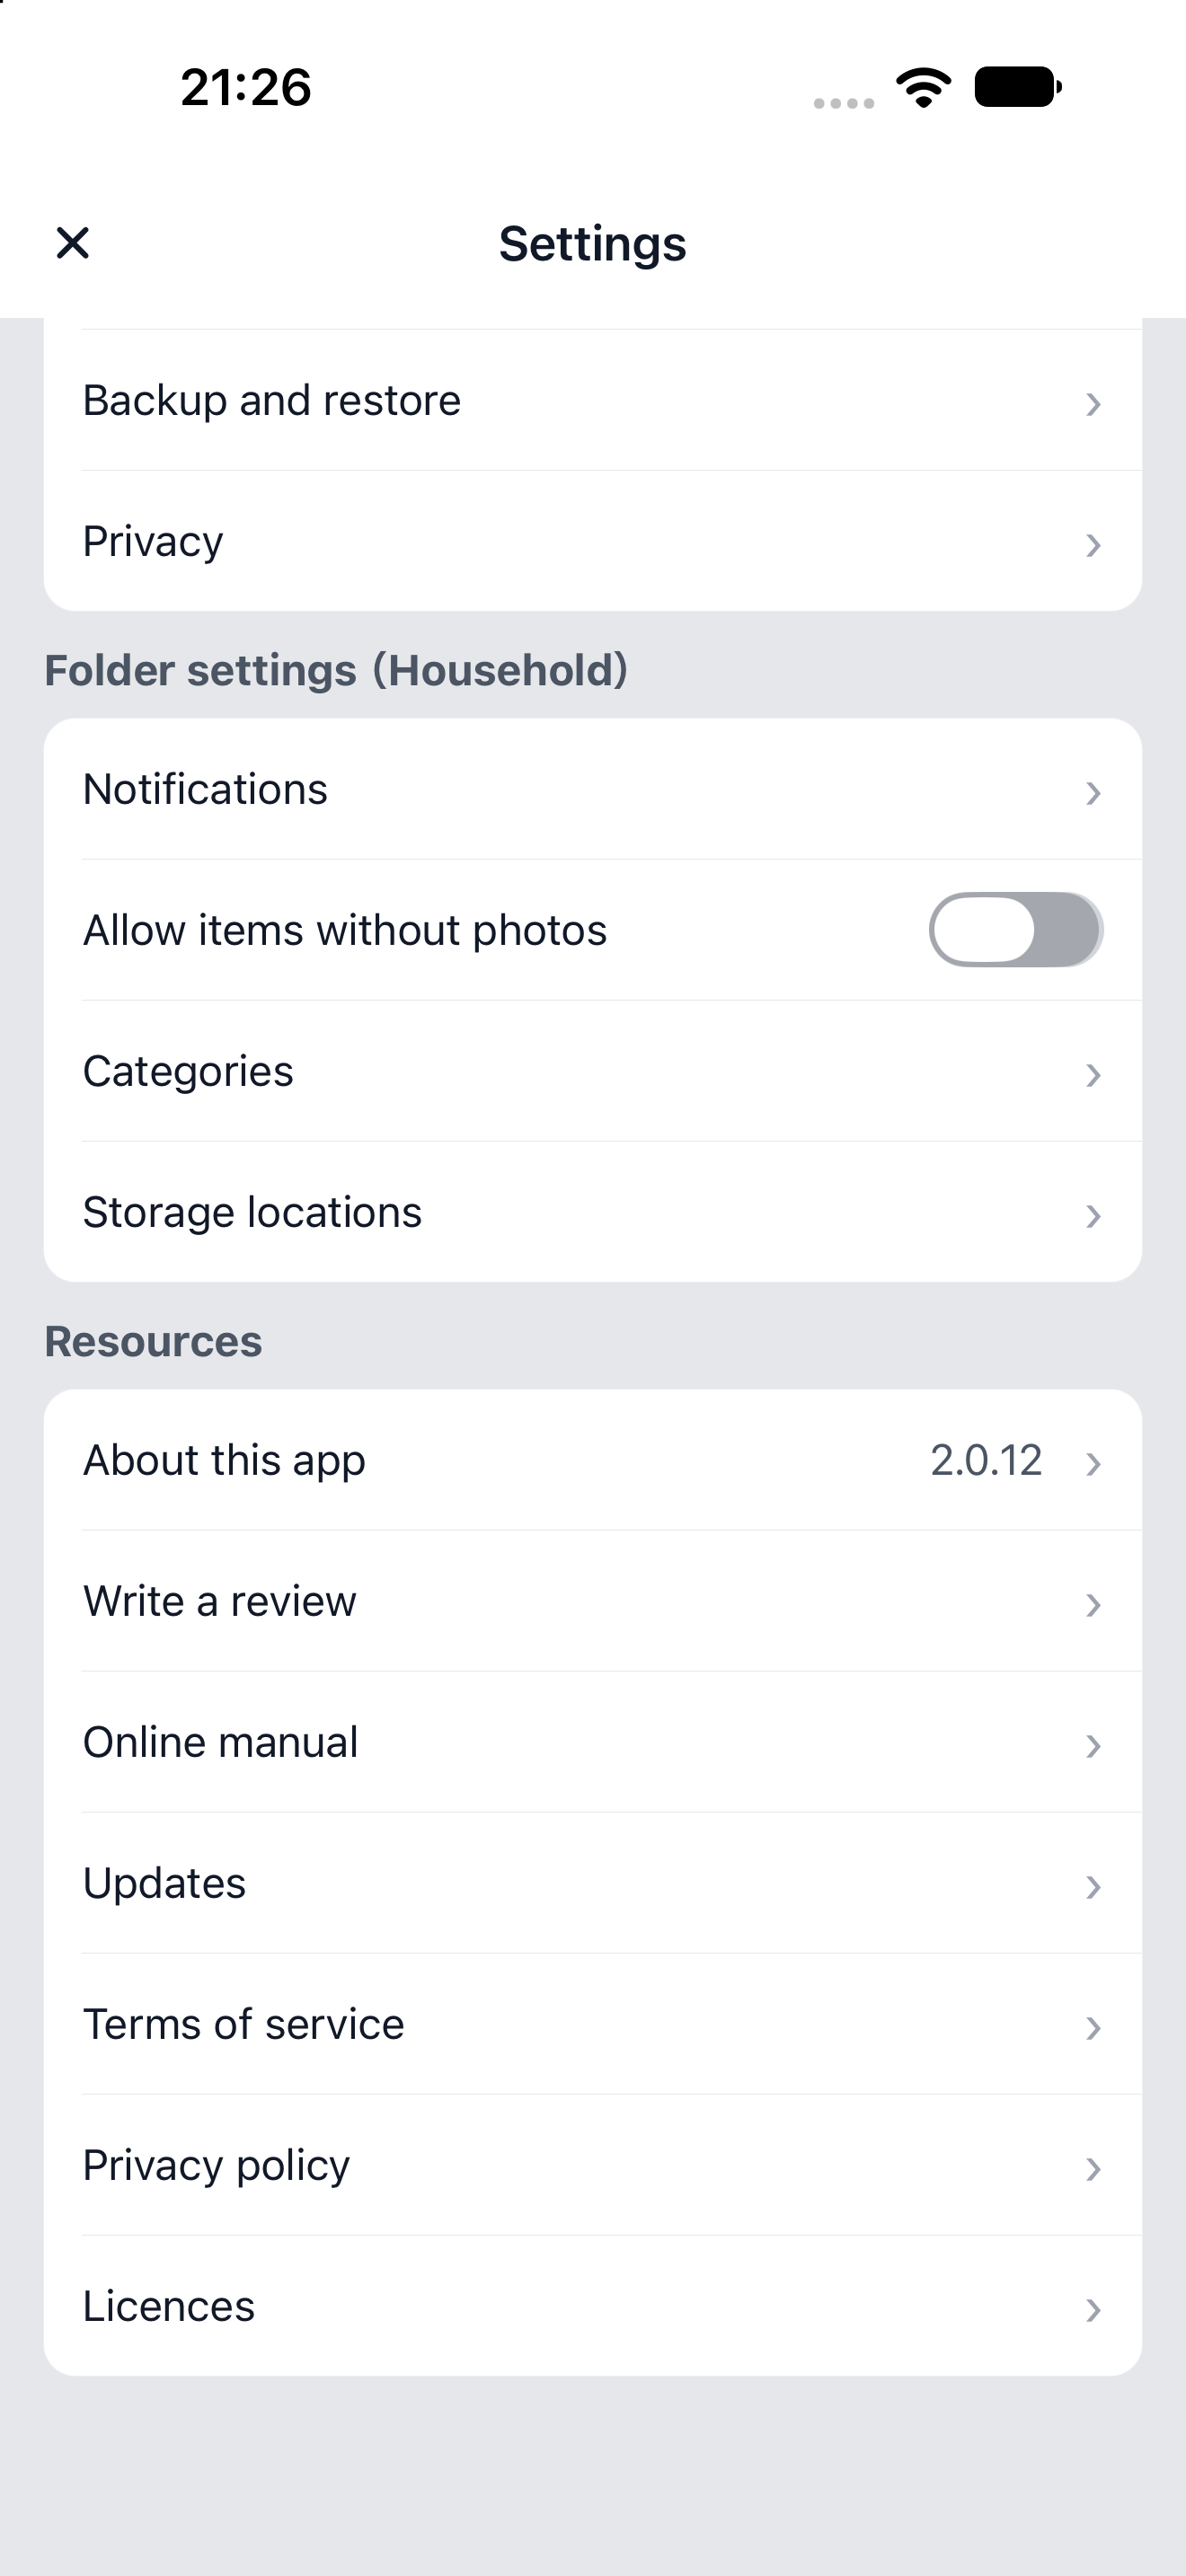
2
18Edit categories
Adapt the home screen’s colored labels to your own classifications.
- In settings, open “Categories” under “Folder settings”.
- Enter a name and tap “Add”.
- Tap an existing category name to edit its name or color, then save with the checkmark.
- Press and hold the three-line handle on the right and drag to reorder. Tap the trash icon to delete.
Back to contents ↑ 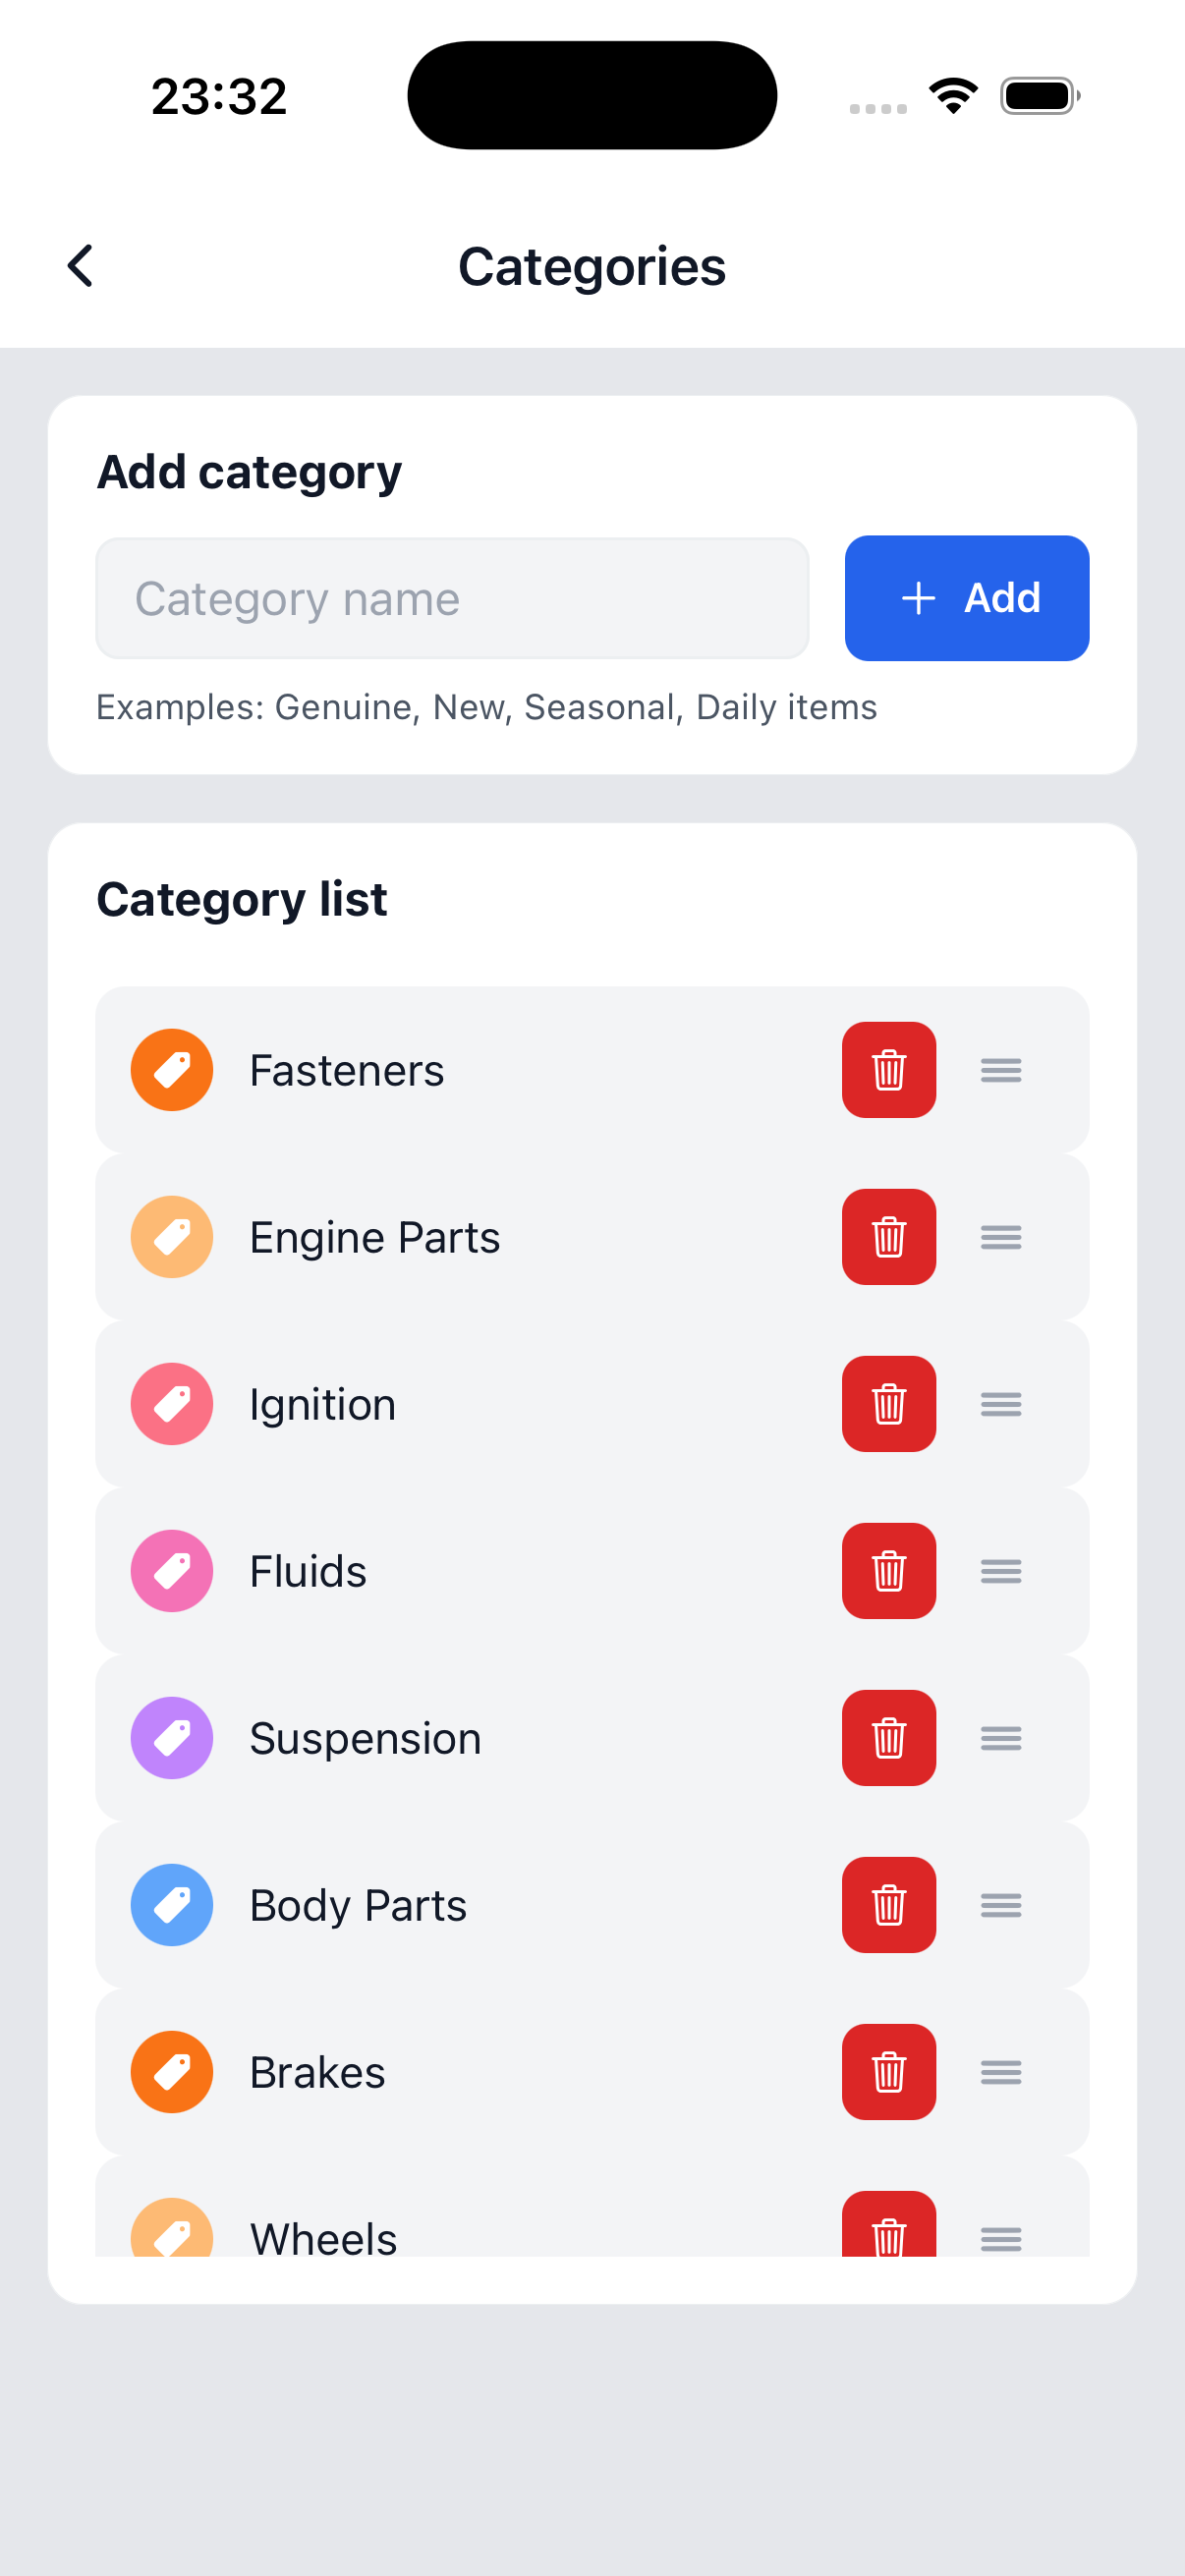
234
19Edit storage locations
Organize locations to match your shelves, drawers and containers.
- In settings, open “Storage locations” under “Folder settings”.
- Enter a location name and tap “Add”.
- Tap an existing location name to edit it, then save with the checkmark.
- Use the photo icon to set a cover photo. Hold the three-line handle to reorder, or use the trash icon to delete.
Back to contents ↑ 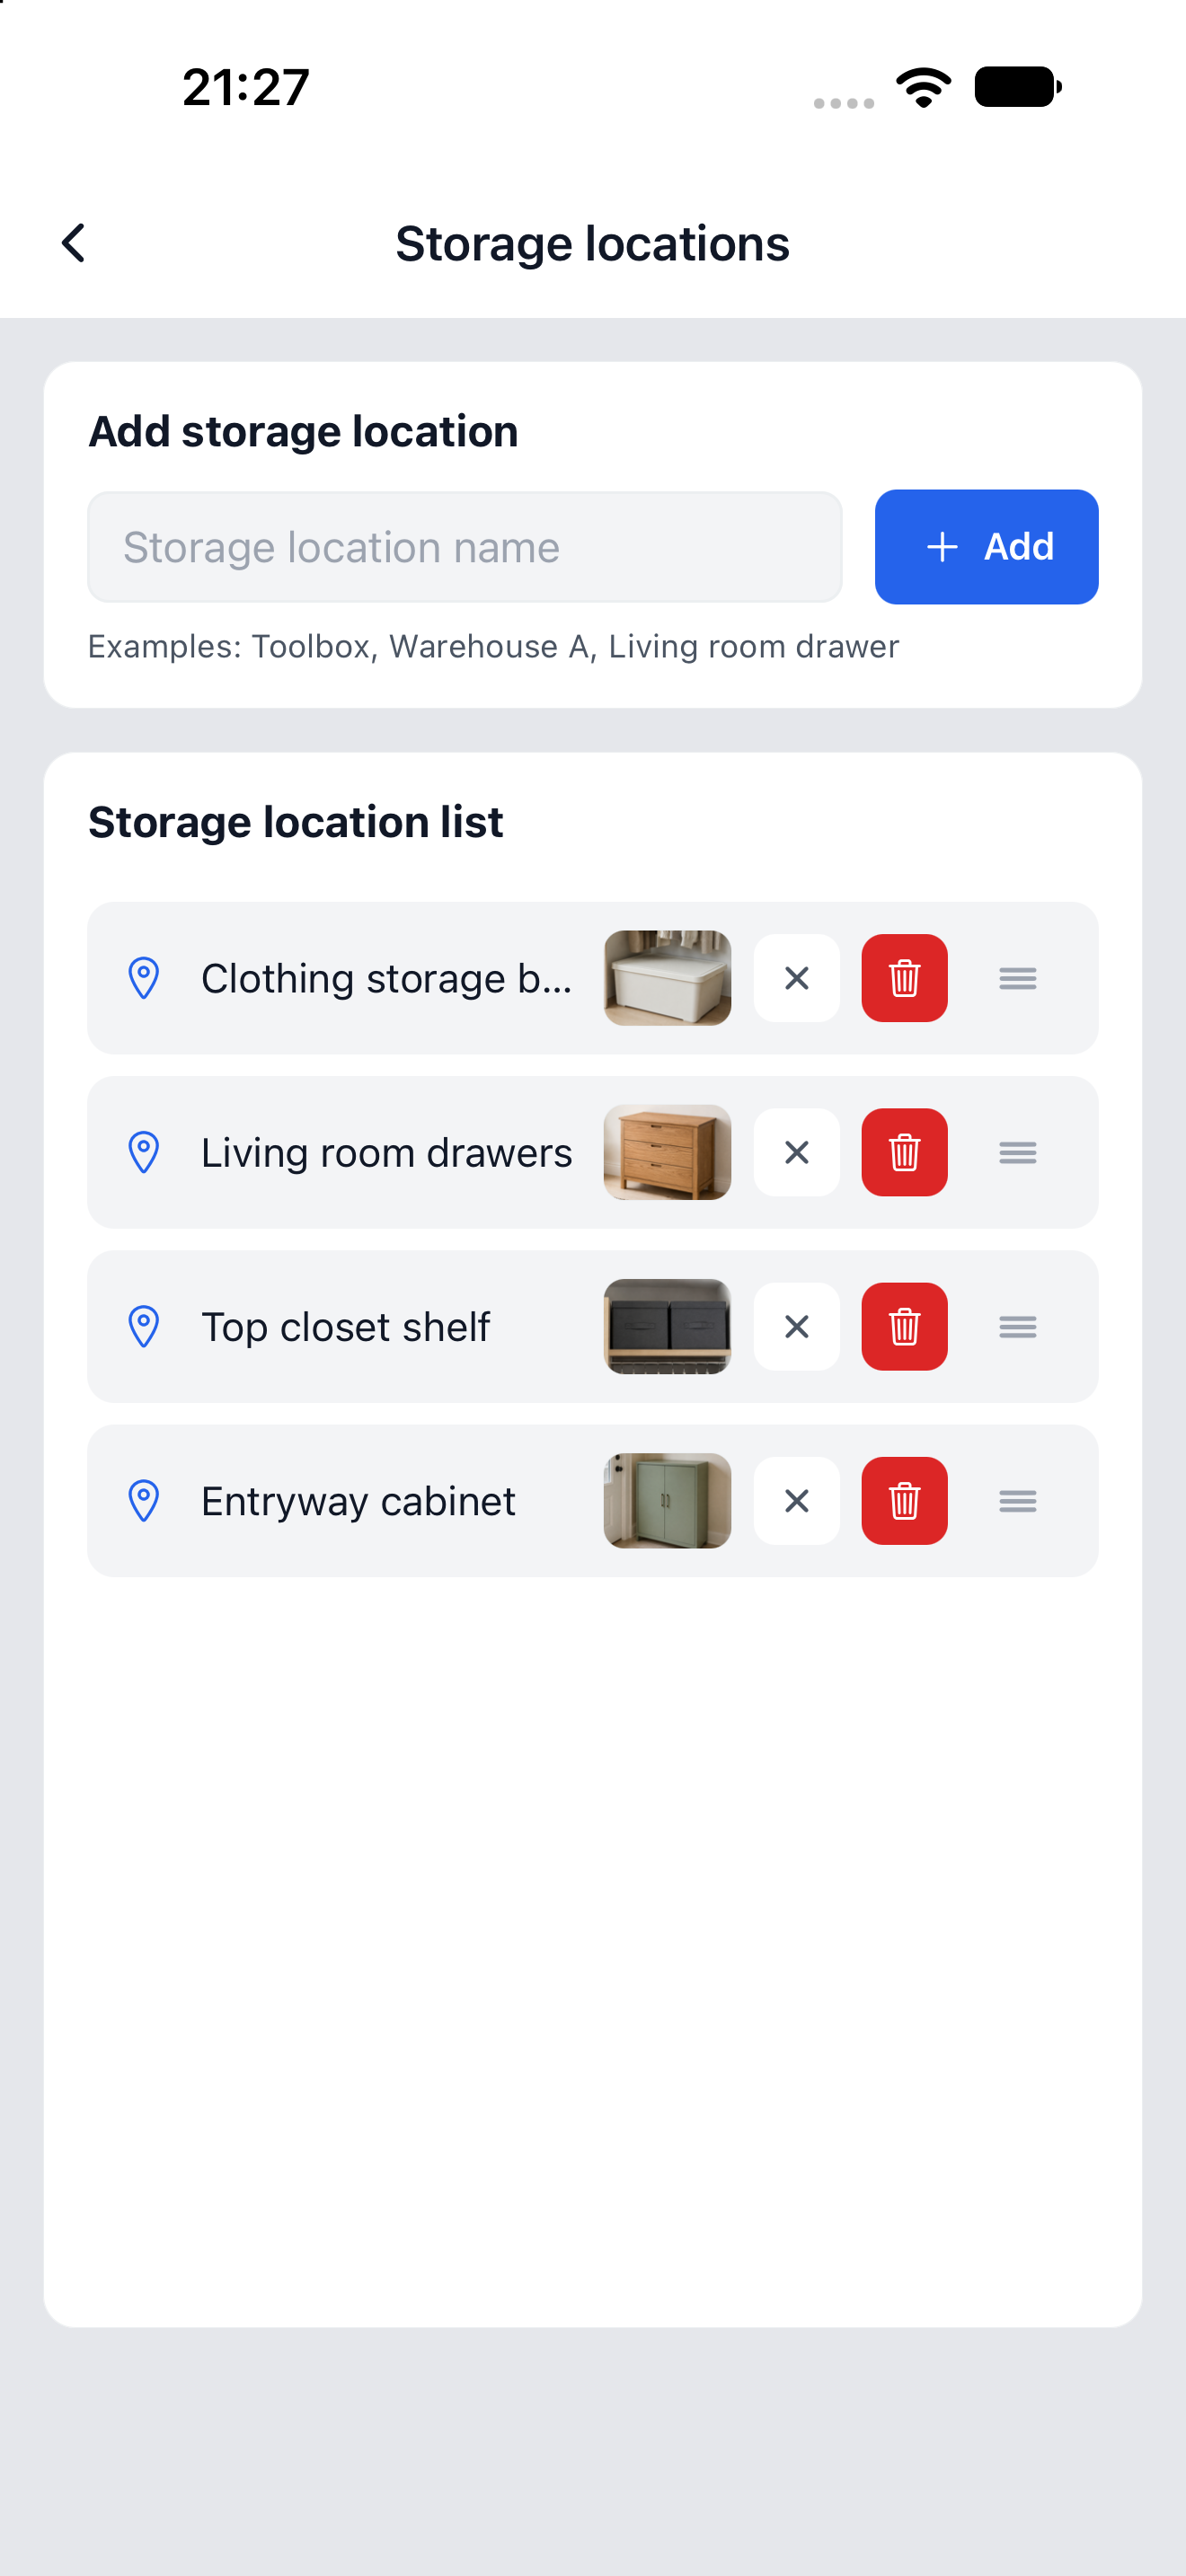
234
20Back up and restore
Save your data to files in preparation for a device change or other needs.
- Open “Backup and restore” in settings, choose “Export” for the folder you want and save the file.
- To restore, choose the saved ZIP from “Import”. Keep every part of a split backup together.
Back to contents ↑ 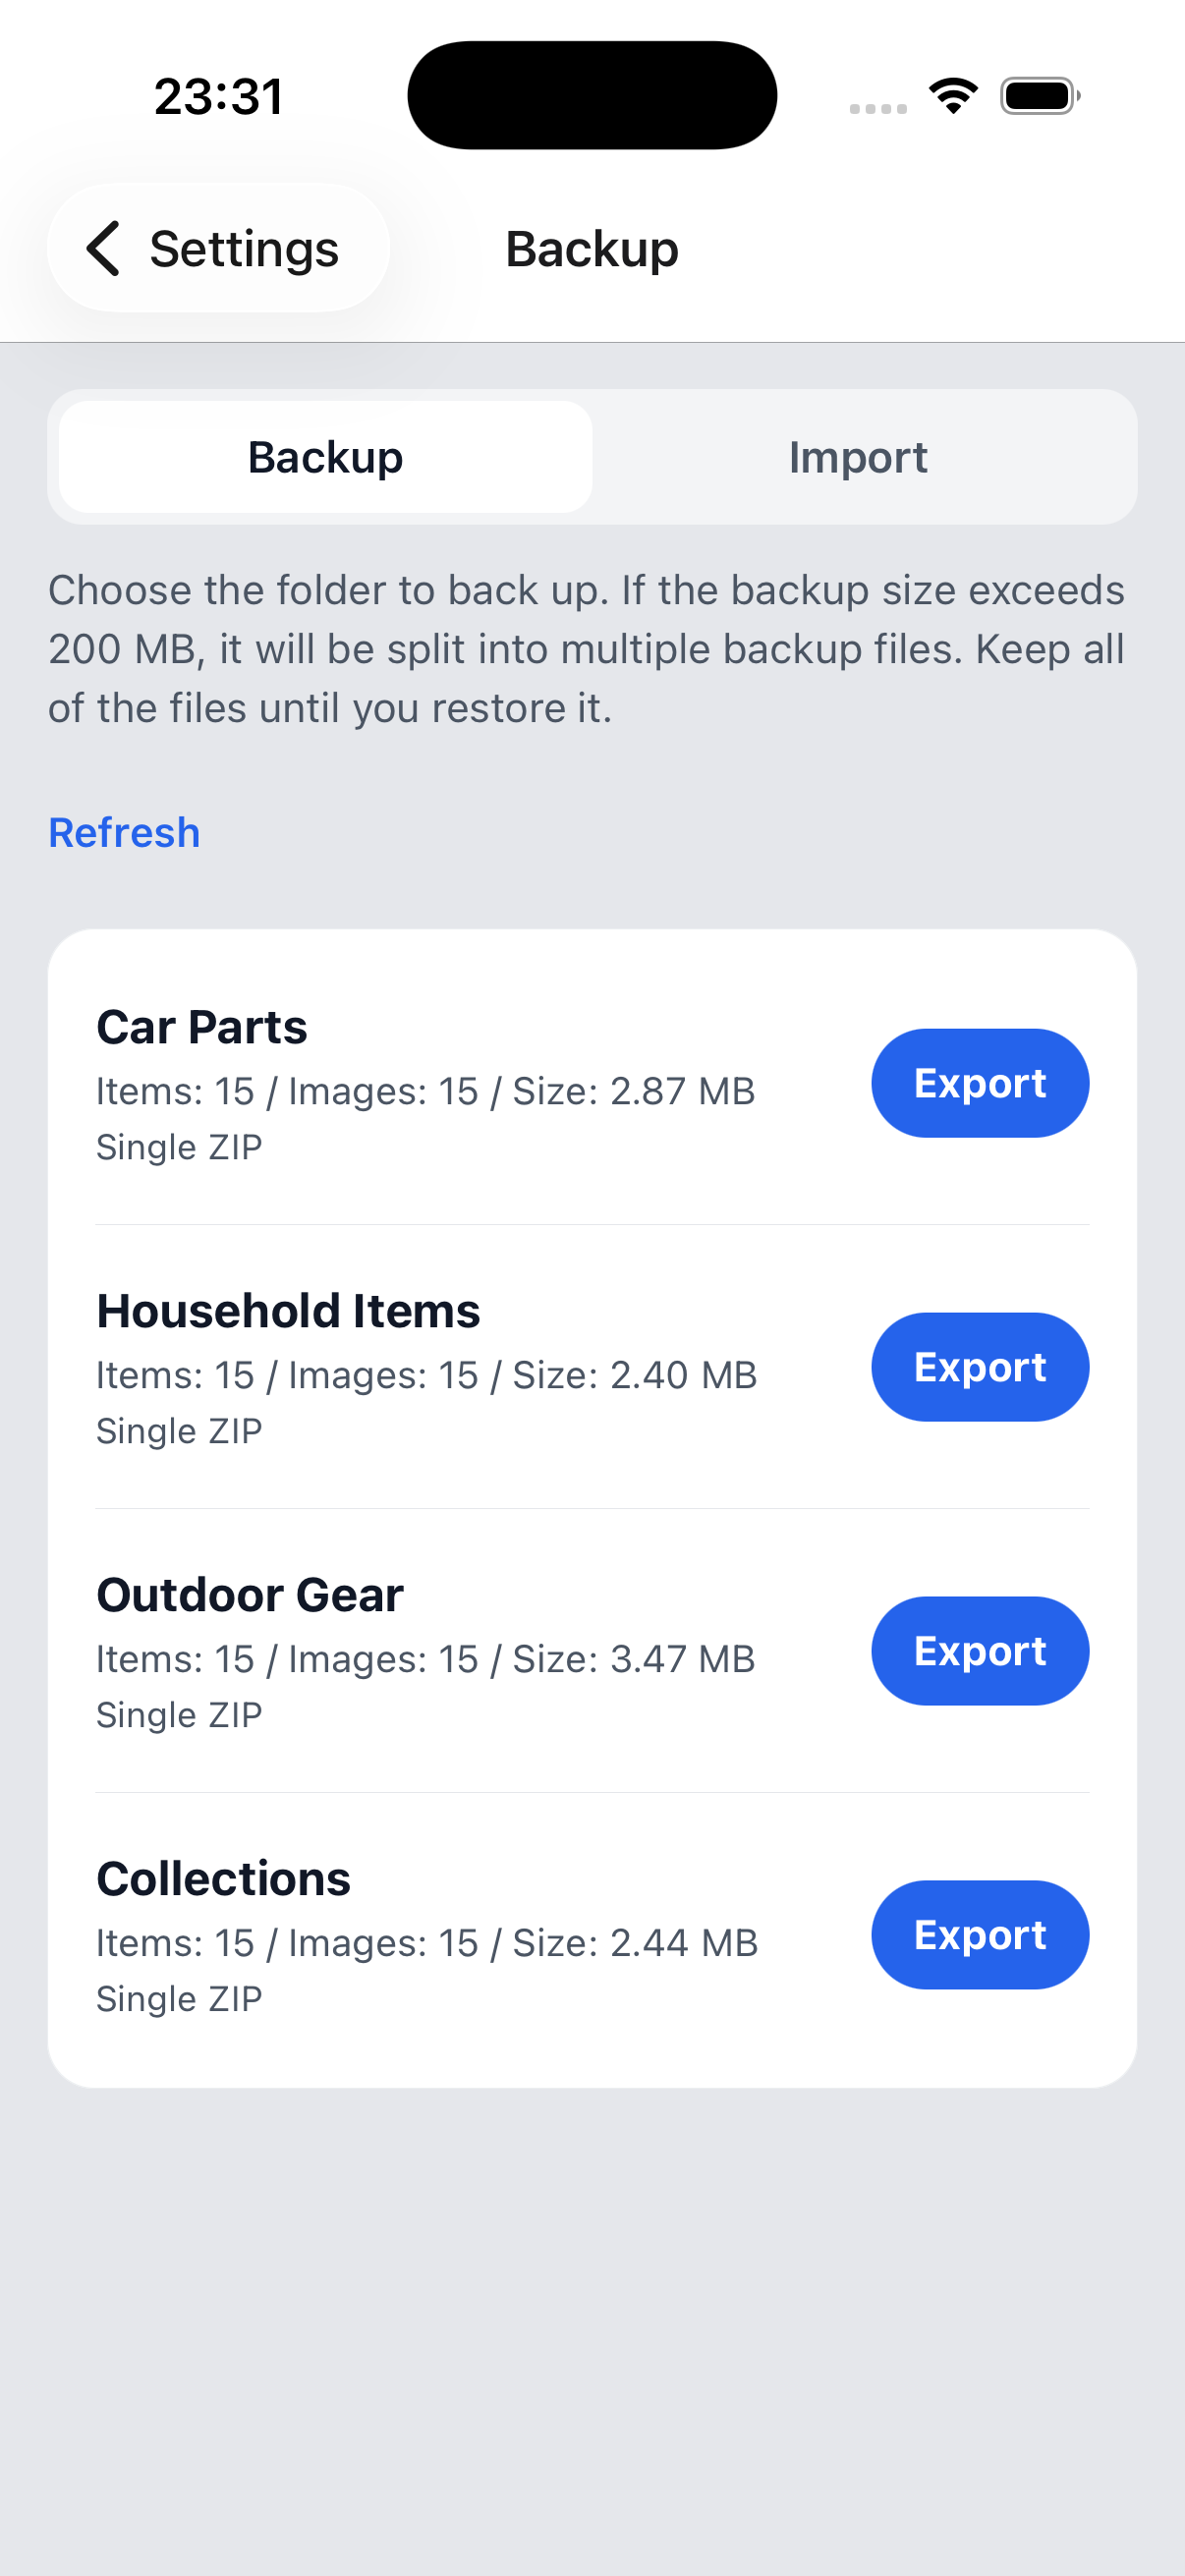
12
Need help?
If you have a question about using Stokki, please contact us.
Contact us